The Fishermen's Trail in Portugal | The Essential Guide
Thinking of walking the Fishermen’s Trail in Portugal?
Our guide will help you plan and prepare perfectly for the stunning multi-day walking route in a lesser-visited part of Europe.

Some people would tell you there are better ways to spend two weeks in southern Portugal than walking nearly 250km from Alentejo to the Algarve.
Whilst those people wouldn’t be entirely wrong, they also don’t have a clue what they’re missing out on.
A long put-off travel dream hastened by the number on a New Year’s Day weigh-in, the decision to hike the full-length Fishermen’s Trail was about challenging ourselves, treating ourselves, and walking toward a sense of freedom.
Rightly regarded as one of Europe’s most beautiful coastal trails, it’s the most popular long-distance walk on the Rota Vicentina network. Composed of the thirteen one-day sections, visitors can dip in and out of it on short, easy hikes between beaches and towns, slowly walk a single section, or follow the route for several days to a couple of weeks.
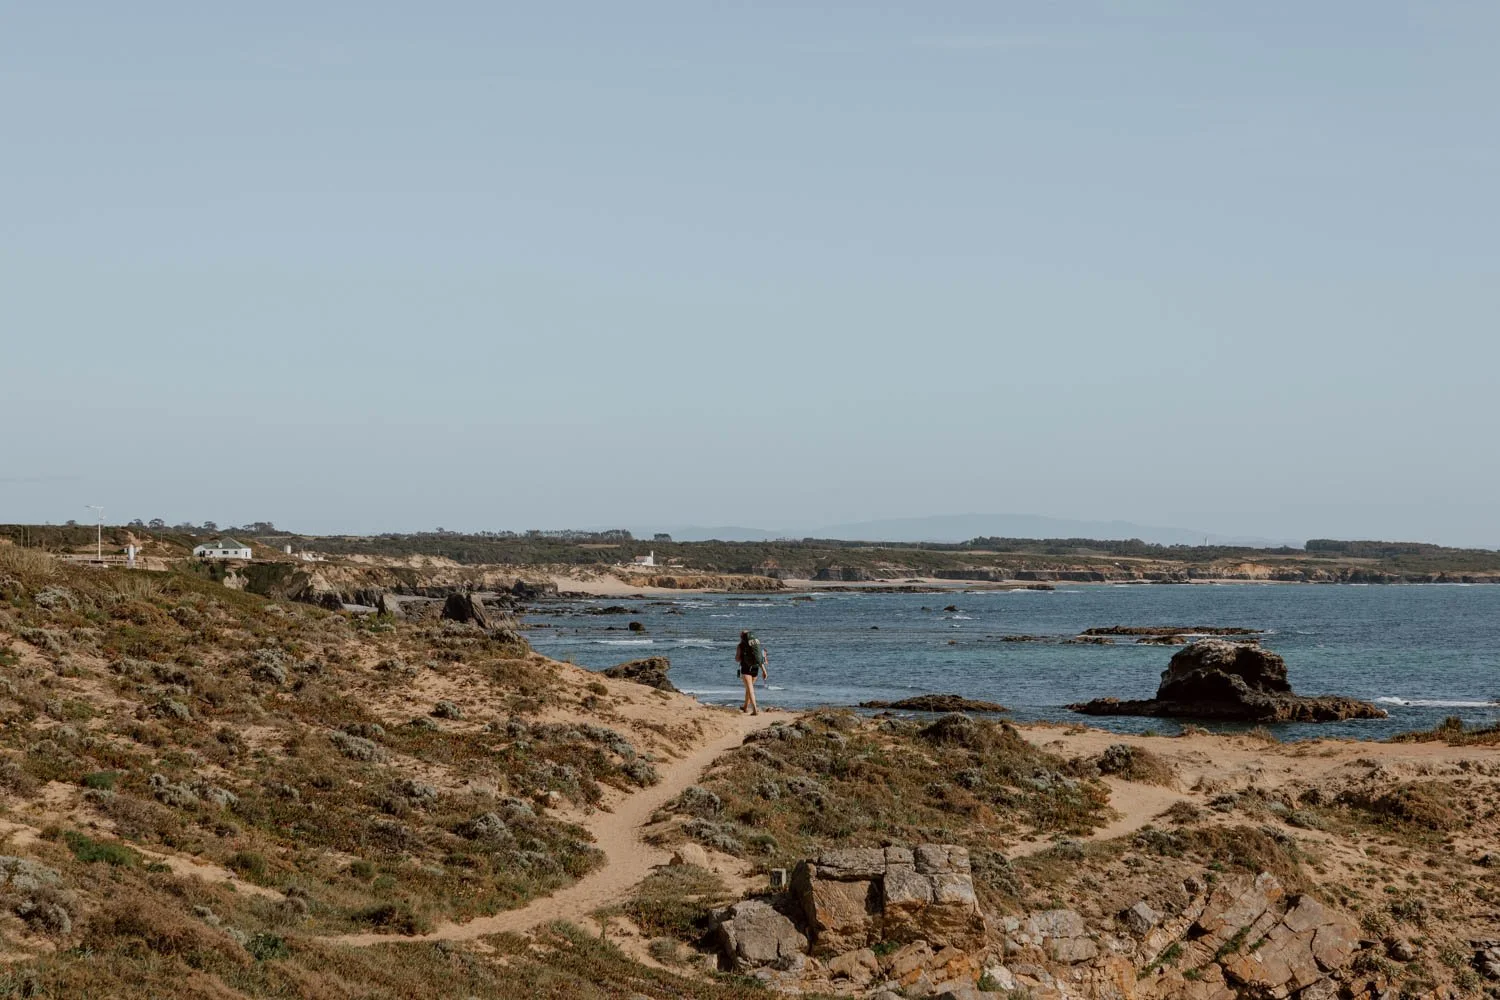
Along the way, there’s dramatic cliffs, pristine beaches, colourful fishing villages, wildflowers, surf, delicious seafood, and the mesmerising pull of the waves.
The thought of each day’s main task simply being to put one foot in front of the other on the way from one place to another - with everything on our backs and the Atlantic Ocean as a near constant-companion - sounded like some version of heaven to us.
If you’re curious about the taking on the short or long version of The Fishermen’s Trail (Trilho dos Pescadores), or you’re just starting to plan properly, then this is the post for you.
Alongside all the essentials on the route, the packing, the logistics, the terrain, the accommodation, and the prep, we’ll share our hard-earned personal insights and practical advice for walking the Fishermen’s Trail. Covering its most beautiful sections and beaches, to unmissable restaurants, our biggest mistake, and a definitive answer on whether you should start in the north or south, you’ll be in the best position to decide if this is the hike for you and get ready for your own independent adventure.
This is our essential guide to the Fishermen’s Trail in Portugal.
Bonus // Make sure to also check out our free companion article for your hike: the Fishermen’s Trail Day-By-Day Planner

The Fishermen’s Trail Essentials
What | A gorgeous coastal-hugging trail along clifftops & beaches
Distance | 226km /140 miles
Time | 11 to 13 days (shorter versions possible)
Difficulty | Moderate but distances make it challenging overall
Starts | São Torpes beach in Alentejo (2-3 hours south of Lisbon)
Ends | The city of Lagos in the Algarve (1 hour west of Faro)
Direction | Can be done in north-south or south-north
When | September to June, best in spring and early autumn
Terrain | Mostly dusty trails, some sections on dunes & beaches
Signage | Generally well-marked throughout
Kit | Standard hiking gear, but sandals or gaiters good for the dunes
Luggage | Carry everything or use the pricey transfer service
Stay | Hostels, guesthouses Airbnbs & hotels - no camping
Permits | Free to access, no reservation or permits required
What & Where Is The Fishermen’s Trail?
This long-distance coastal hiking route in southwest Portugal runs from São Torpes beach in the region of Alentejo to the town of Lagos in the Algarve.
Whilst the Algarve is a well-known holiday destination, Alentejo is Portugal’s quiet, off-the-radar heartland - a sprawling region of open countryside, olive groves, and unspoiled coastline, still blissfully overlooked by most tourists.
Much of the trail follows age-old tracks used by fishermen to reach hidden coves and fishing spots, and you’ll still see locals working these waters today.
The name and the route have therefore been around for a long time, but were later incorporated into the wider Rota Vicentina brand - a 750km network of walking trails across the two regions. It’s a community-led project created to promote sustainable, low-impact tourism in Portugal’s southwest and protect its natural landscapes.
That’s also why you’ll speak to plenty people walking the Fishermen’s Trail who say they’re hiking the Rota Vicentina, and vice-versa!
Honestly, and rather embarrassingly, we actually weren’t that certain of the distinction until we were almost finished up the thirteen days of walking!
FYI | It’s commonly called the ‘Fisherman’s Trail’ online, but the correct translation and official name is ‘Fishermen’s Trail’.”

The Itinerary & How Long Do You Actually Need?
The official Fishermen’s Trail itinerary, split into daily sections ranging from10km to 22.5 km a day, covers 226km / 140 miles and can be walked in 11-13 days from start to finish (with most people adding in at least one or two rest days along the way)
We’ve outlined the daily breakdown with their estimated times below:
| Day | Start | End | Distance (km) |
|---|---|---|---|
| 1 | São Torpes | Porto Covo | 10 |
| 2 | Porto Covo | Vila Nova de Milfontes | 20 |
| 3 | Vila Nova Milfontes | Almograve | 15.5 |
| 4 | Almograve | Zambujeira do Mar | 22 |
| 5 | Zambujeira do Mar | Odeceixe | 18.5 |
| 6 | Odeceixe | Aljezur | 22.5 |
| 7 | Aljezur | Arrifana | 17.5 |
| 8 | Arrifana | Carrapateira | 20 |
| 9 | Carrapateira | Vila do Bispo | 16 |
| 10 | Vila do Bispo | Sagres | 20.5 |
| 11 | Sagres | Salema | 19.5 |
| 12 | Salema | Luz | 12 |
| 13 | Luz | Lagos | 11 |
The three main pre-trip decisions we made after a lot of research were:
Starting in Porto Covo, rather than São Torpes (good choice)
Our rest day would be in Sagres (big mistake)
We wouldn’t combine the final two sections from Salema - Lagos (no biggy)
This meant that we completed the trail in 13 days, one of which was a rest day in Sagres.
The official sections for the Fishermen’s Trail make planning your itinerary really easy; beyond a few minor potential tweaks, there’s no need to waste your time trying to create an original or bespoke route. This also makes finding accommodation an awful lot easier.
But, if you’re short on time or confident about covering distances, there are a few sections, particularly on the Sagres-Lagos final stretch, that can be combined to save you a day or two overall too.
Many hikers choose to skip the first section from São Torpes to Porto Covo, just as we did.The general consensus is that it’s not terribly pretty. At just 10km, it’s also annoyingly short for a standalone first day but just that bit too long to combine it with Day Two.
Porto Covo was also the original start point, and beginning there instantly frees up a day on your itinerary - and allowing you to complete the full version in 11 days (if you opted for zero rest days).
Rather than the full version though, most people will actually tackle a shorter 4-5 day 76 km route on the very pretty section from Porto Covo to Odeceixe. If you aren’t able to dedicate two weeks to the full Fishermen’s Trail, or you have concerns about budget or ability to complete the complete 140-mile route, then you should absolutely be considering this ‘Classic’ route as your alternative - we’ve got more details on it later in the post!
When planning logistics and annual leave though, it’s important to remember that most will also require a day either side of their hike dates - and some may wish to throw in another recovery day too!
Alternatively, if you’re reading this whilst you’re relaxing on holiday in Portugal, you can simply head out on a Fishermen’s Trail section for a pleasant coastal walk, day trip between two towns, or means to reach some stunning, quiet beaches!


How To Reach The Start
There’s no airport in Alentejo and not much train coverage, so the easiest way to reach the northern start of the Fishermen’s Trail is by bus from Lisbon.
If travelling to Portugal specifically for the hike, the best option is to fly to Lisbon’s Humberto Delgado Airport (maps) and then take one of the buses down to Sao Torpes or Porto Covo (maps). These depart daily from both the Oriente and Sete Rios bus station in Lisbon.
Travel time from Lisbon to Porto Covo is 2 - 3 hours, and we were fortunate to find a flight arriving in the early morning which enabled us to catch the first afternoon bus from Sete Rios bus station (maps).
There are up to 10 departures per day in summer, but this reduces quite a bit outside the season, when tickets often sell out; it’s therefore a very good idea to book your bus ticket in advance.
You can buy your tickets on the official bus company website, but note that they only go on sale 90 days before departure.
Alternatively, if walking the Fishermen’s Trail south to north (the less common way), you should fly into Faro (maps) and take the 60-minute train to Lagos (maps).
Bear in mind, most hikers doing the 11-13 day route will travel out of a different airport/train station/bus terminal in Portugal than they started! For example, we flew into Lisbon and out of Faro. Those on the 4-5 day route often take the bus from Odeceixe to Lisbon.
Plan // We’ve shared more details and advice on start points, transport connections, logistics from Lisbon, and how we got everything for two weeks on as hand luggage in this post: How to Get From Lisbon to Porto Covo
When To Hike The Fishermen’s Trail
Although the paths are open year-round, the official recommendation is to walk between September and June.
This is primarily because the heat of peak Portuguese summer would make many sections unenjoyable and potentially dangerous, but July and August also bring a spike in tourism, pushing up prices and limiting accommodation options.
Additionally, as some of the Fishermen Trail’s paths are the only way to access several spectacular beaches, footfall from sunbathers increases in the holiday months.
We’re very much fair-weather hikers, and decided that May would be ideal for sunny spring conditions with plenty wildflowers in bloom, and temperatures much closer to what one hopes for in Portugal than the Scottish Highlands.
We also wanted the coastal towns and businesses to be open for the season so that we could enjoy our pre and post-hike time.
For us, May turned out to be absolutely perfect, with mostly blue skies, only one day of rain, and average temperatures in the 18-23°C range. If you’ve got similar preferences, we’d suggest the ideal time to hike the Fishermen’s Trail is in spring (April to early June) and late summer / early autumn (late September to October).
However, you have to factor in the potential for high temperatures the closer to summer you start.
Winter walkers are a different breed. Whilst they’ll benefit from cheaper accommodation rates and share the Fishermen’s Trail with far fewer people, the trade-off is wind, rain, and grey skies. Much less will be in bloom and the Atlantic landscapes will take on a wilder, more brooding appearance. Average daytime temperatures will also hover around 10°-13°C too, so you’ll have to pack many more cold and wet weather clothes.
That sort of walking experience isn’t without its merits of course, but we know when we’d prefer to be in Portugal!
The luggage transfer service also doesn’t run in November and December (more on that later).
April - June | Best for wildflowers, comfortable temperatures, and long daylight hours.
September - October | Warmer seas and fine weather, but busiest walking period.
July - August | Too hot. Too busy. Don’t bother.
November - March | Cooler and unpredictable weather with seasonal businesses shut, pack for wind and rain.


Ok, How Difficult Is It Really?
Beyond time constraints, the biggest question to ask yourself is whether completing the short or long Fishermen’s Trail is realistic for your physical condition and hiking experience.
Our rule of thumb: the sections themselves aren’t overly difficult but it’s the daily distances, the back-to-back days, and the gradual build-up of fatigue that make the Fishermen’s Trail a challenge. Walking a single section feels like a pleasant coastal stroll, but doing five or ten days in a row is a different story!
The good news? This isn’t a hardcore hike or technically complex profile, so for nearly all walkers, the paths and conditions themselves are eminently manageable. We met travellers in their 20s, 30s, 40s, 50s, 60s, and even an incredible German woman in her late 70s walking the entirety of the trail with her friends!
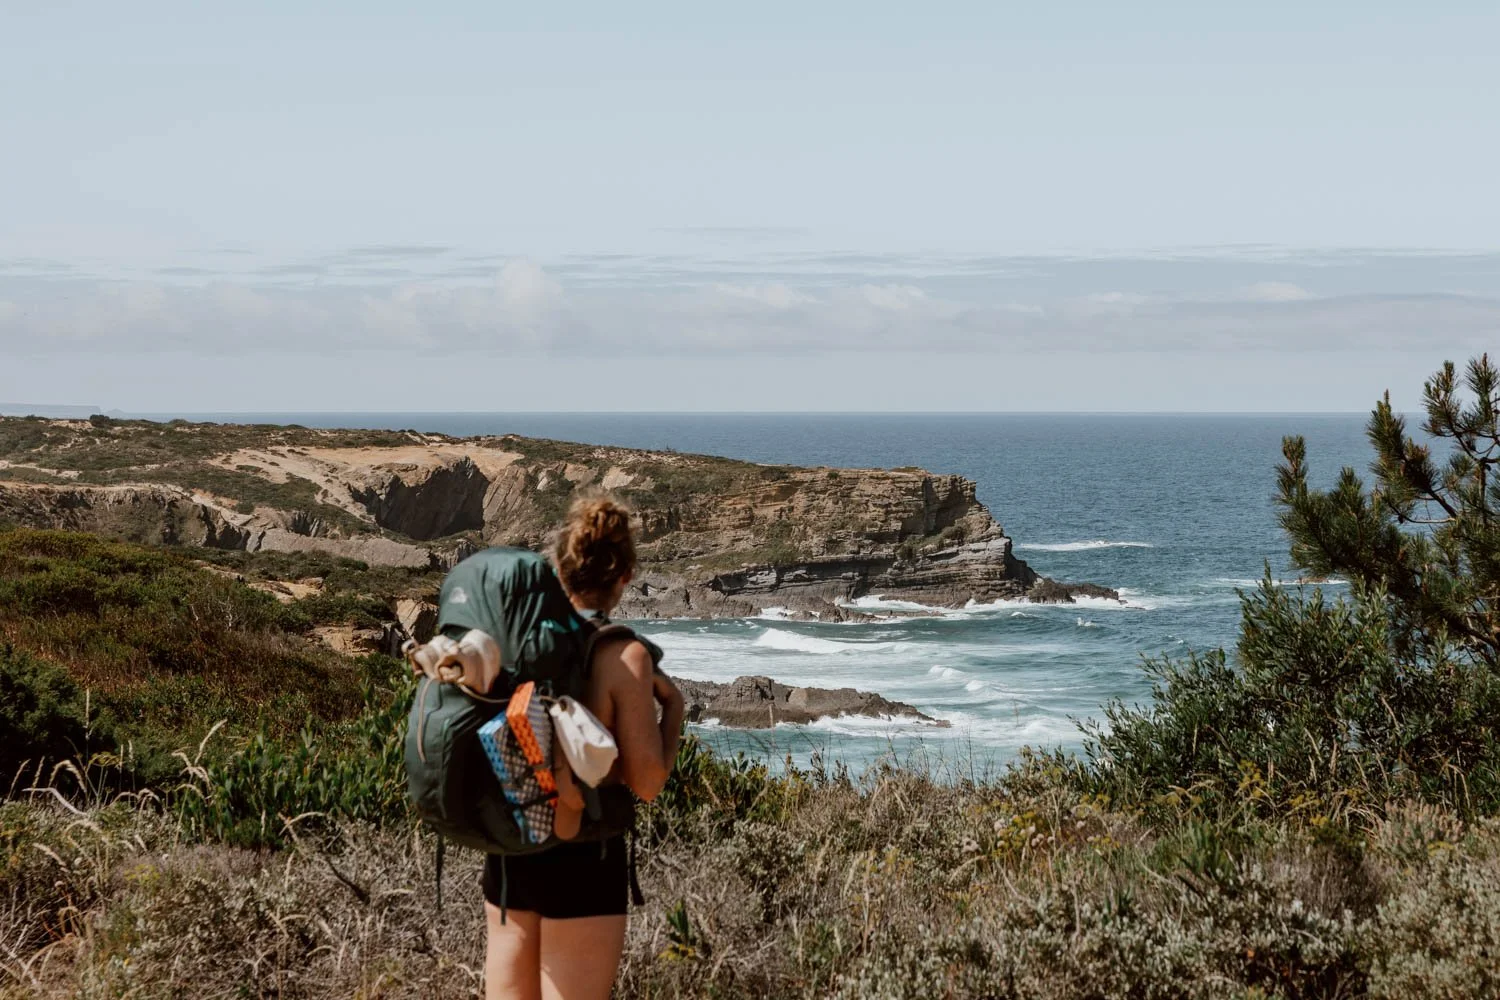
Most sections are (mostly) flat with no major peaks, troughs, or steep climbs. You’ll cover pleasant coastal paths, countryside tracks, clifftop grassy trails, pavements, and quiet dusty roads, with some sections along soft sand dunes and beaches. There’s no scrambling, rock climbing, ropes, or vertiginous drops. When you do need to get down to secluded beaches below clifftops, you’ll find well-built wooden walkways and staircases
Sidenote: we swear the Portuguese are arguably the best in Europe when it comes to building those.
Daily distances are achievable and realistic - typically 11km to 22.5km - although they do frustratingly often end up being a bit longer than official estimates.
The not infrequent 20+ km days do require more planning, preparation, and perseverance though.
Although the landscapes are wild, the trails are all very well-marked, sign posted, and easy to follow.

That said, the sandy terrain in parts does present its own challenges, the up-downs of the Zambujeira do Mar to Odeceixe section can be tough for some, and the fatigue and the blisters inevitably takes their toll. On Day 10 (Sagres to Salema), we truly couldn’t wait for it all to end.
Weather can also be a factor on how tough a day feels, as does the fact you’ll be carrying nearly everything on your back.
So, whilst you really don’t need to be super experienced, super fit, or a serious walker to be able to hike the Fishermen’s Trail, those qualities will certainly make it easier and more enjoyable. Therefore, please use your judgement and, if not currently in the best condition, view this as your training motivation!
If you’re fit and mobile enough to comfortably carry a 8-12kg backpack and walk 6-8 hours a day at a steady pace, you should be able to manage multiple sections over several days and the 4-5 day version of the Fishermen’s Trail will be a realistic goal!
Any distances or days beyond that sort of comes down to you, with the biggest challenge being getting up and being motivated to do it all over again for the 6th, 8th, or 10th day in a row!
On a personal note, and for context, the Fishermen’s Trail was the longest mult-day walk we’d ever done together. We both have pretty decent level of fitness and experience of doing tough hikes at altitude in Latin America over the years, and we arrived in Portugal not long after a month of summiting several volcanoes in Guatemala.
Still, Emily cried and we got into an argument right at the start of the trail in Porto Covo because she was terrified she wouldn’t manage to walk that far, for that long, carrying her backpack on a dodgy back .
And, despite our decent fitness, there were a few challenging moments on the trail where stamina and mindset had to overcome physical issues.
However, we wouldn’t change a single thing (except perhaps our rest day choice), and post-hike beers also seemed to fix most ailments!
Emily also finished like a champ: feeling stronger, fitter, and happier than ever before.
Travel Tip // If you’re worried about carrying a heavy pack, then you should consider the luggage shuttle service that’s available. It’s not cheap but is definitely convenient, and could be the difference maker you need for completing the trail!


The Classic Route vs. The Full Fishermen’s Trail
Most people don’t have two weeks to spare for a coastal walk in Portugal, so we really want to emphasise that when talking about the Fishermen’s Trail, the majority of people are referring to the classic, four or five day route.
Starting in Porto Covo in Alentejo, it follows the Atlantic Ocean to Vila Nova de Milfontes, Almograve, Zambujeira do Mar, and finishes in Odeceixe.
Each day’s section will involve 5.5 - 8 hours out walking, covering a total distance of 76km.
This is considered the most beautiful stretch of the full Fishermen’s Trail, and was supposedly the core of the route before it was significantly extended and connected up as part of the Rota Vicentina tourism project. Having walked the whole thing, we can confidently say that this shorter section lives up to the reputation, and will really deliver on the highlights!
It will also leave your feet and legs only slightly wrecked.
If you’re dreaming of the freedom of just putting one foot in front of the other whilst being immersed in nature and spectacular coastal scenery, this is going to tick every single box. Most will go from start to finish in four or five days, but the classic version of the Fishermen’s Trail also allows you to play about with a week in Portugal and bookend the stay with more time in Lisbon or Faro, or an extra day to stay and enjoy one of the beach towns along the route.
From what we saw and heard though, it’s fair to stay that this northern section is the most popular multi-day walk on the Rota Vicentina. Indeed, as we continued south after Odeceixe, it was very noticeable how many of the familiar faces from the previous days had disappeared.
Don’t take that as a byword saying that this shorter version of the Fishermen’s Trail is incredibly crowded or overdone though; this is very much still a long-distance walking test and experience.
As for the full Fiserhmen’s Trail? Well, it’s almost a different experience entirely.
We loved the challenge, the solitude, and the chance to pass through and visit several more parts of this relatively unknown part of Portugal - and there are a bunch of really cool places on this stretch from Odeceixe to Lagos. However, you need more stamina and perseverance, and your harder moments and days are quite a bit worse than anything on the classic. Factoring in a rest day is also essential.
Of course, there’s also the issue of increased costs: at more than twice the distance, it’s also likely to cost at least twice as much - and you’ll need to carve out more time, whether that’s from work or what you’d usually allow for a holiday.
But for us, that slower, longer journey became part of the appeal. The sections beyond the classic route were far quieter - some days we passed only a handful of other walkers - and we loved the chance to follow part of the Historical Way too, passing inland through villages, arid farmland and seeing a different side to southern Portugal beyond just its (admittedly stunning) coastline.
The Classic
Distance & Days: 76km | 4-5 days
Route | Porto Covo to Odeceixe
Avg. Day | 19 km
The Full Fishermen
Distance & Days: 226km | 11-13 days
Route | São Torpes or Porto Covo. to Lagos
Avg. Day | 19 km
Of course, you could also choose to go rogue and decide to do a complete different for our five day route part of the Fishermen’s Trail - but you do have to make sure it’s doesn’t include some of the ‘skippable’ days we had.
Plan // Find everything to help you plan and book ahead for the classic, the full, and the bespoke in our day-by-day Fishermen's Trail itinerary post


North or South: Which Direction’s Better?
We’ll try to be brief here, as we wasted far too much time in the research phase trying to find a useful answer.
You can hike the Fishermen’s Trail in either direction, and because Lagos is much better-connected and easier to reach than Porto Covo, we’d understand why you’d be thinking about starting your walk down there.
Also, as most people hike the Fishermen’s Trail south from Alentejo down toward the Algarve, you may simply prefer to be contrarian or think going the opposite direction to others will unlock some hidden secrets or perspectives. There’s also a lot of talk online about the sun being in your face or not.
However, take our word that going from north to south (São Torpes/Porto Covo > Odexeice > Lagos) is going to be the best choice if you’re doing the Classic route.
It’s also going be the best direction if you’re doing the full Fishermen’s Trail because:
you’ll enjoy the most beautiful sections and scenery whilst you’re still at peak enthusiasm
the end stages in the increasingly developed Algarve aren’t as remarkable and more about ‘getting through’
you don’t want to have the dunes of the northern section on your final days, when you’re tired and blistered
whilst we didn’t really love Lagos, it’s undeniably quicker and easier to get home from there than Porto Covo
as many of the trails are single-track narrow, it will stop you having to get out of the way of people coming the other way every ten minutes
The route profile and nature of the trail doesn’t really make a difference as the ups and downs basically balance out.
Of course, feel free to throw that advice out the window if starting in Lagos is your only option logistically - just be prepared for the final few day’s mileage and the dunes to take a toll.
Travel Tip // If you’re doing the Classic Route, it’s a good idea to book your bus out of Odexeice in advance as it’s the main way out of town and every other hiker will want to be on them.

The Dunes Reality!
The downside of a trail that includes large sections of wild, windswept coastline, stopping off at secluded coves and beautiful beaches along the way?
You have to contend with walking along soft sand and dunes.
If you've already done any research into the Fishermen's Trail, you'll know it’s much-discussed and may even be quite concerned.
We certainly were.
The reality however is that although the sand and number of dunes are the most challenging aspect of the terrain, it wasn't quite the Sahara we’d feared.
The sand is pretty shallow - rather than deep or steep - and is limited to distinct sections. It disproportionately impacts those doing the Classic Fishermen’s Trail, turning parts of the route into a trudge for a few kilometres. They take their toll on your thighs or calves, but honestly, the most annoying part is constantly getting sand in your shoes.
For us, it just felt closer to walking along a golden, sandy beach and wasn’t as big a pain in the arse as anticipated, but some people we spoke to definitely found them more frustrating than we did.
The dunes and sandy stretches are often said to be worst on Day One (Porto Covo to Vila Nova de Milfontes), but they’re just as present - and in places, worse - on Days Two and Three. Perhaps, it’s the surprise is that made them feel harder.
So, don’t fear the dunes - just anticipate and prepare for them!
Their presence also has a significant impact on footwear choices and the likelihood of blisters…
Know // Quite a few people are taken by surprise that the entire route isn’t coastal, with several sections encompassing inland roads, forest, and countryside tracks.
A necessary caveat: as already mentioned, if doing the full two-week Fishermen’s from south to north, then your final days will include all the dunes, so all and any anger you have toward them is fully justified!


There Is No Perfect Shoe For The Fishermen’s Trail
Unfortunately, there’s no single perfect footwear recommendation for the Fishermen's Trail.
Anyone who tells you otherwise is lying.
This is due to the sand, the dunes, the general environment, and the variation in terrain from section to section.
Doing the Trail in May, we decided to leave our trusty hiking boots at home. They’ve gone all over the world with us, but big heavy boots and hiking socks in warm weather and crisp spring sunshine didn’t appeal.
Instead, we hoped a combination of TEVA hiking sandals and a pair of decent running shoes would work well together. Theoretically, the sandals were for the sandy sections and post-hike comfort, while the trainers for days when it was more about mileage and making up time on flat, compact trails.
Switching between the two worked really well - especially when the terrain unexpectedly shifted to sand - but there were definitely sections and days when a boot would have been better than both.
Emily’s ankle would also almost certainly have had fewer issues toward the end of the fortnight if she’d had a bit more support!
On the other hand, the hikers we saw and spoke to who only brought a pair of hiking boots or trainers were cursing the amount of sand they had to empty out of them every few kilometres on certain days, and often looked at our open-toed sandals with envy.
One group even told us they regretted not bringing their sandals instead of their boots!
So, the truth is that there will be pros and cons to any type of Fishermen’s Trail footwear. As terrain underfoot varies from dusty road, roadside, beach, dune, forest track, rocks, grass, and pavement (sometimes on a single day), hiking boots will be best in certain scenarios, hiking sandals will excel in others, and sometimes trainers are a much more pleasant, comfortable alternative to both.

So, what type of footwear should you pack for the Fishermen’s Trail?
We discussed this at length during and after the hike, and think the secret to success is to bring two types of footwear that complement each other. That way, you're covered for all terrains and scenarios, as well as evenings and rest days.
From our experience, the best shoes in warmer months will be a pair of lightweight, broken-in hiking boots and a reliable pair of good hiking sandals (we highly recommend our Teva Hurricane Xlt2). Our running trainers were okay, but the lack of ankle support and sand they allowed in meant we docked points.
In the cooler winter months, hiking boots should be your go-to footwear, with the sandals being swapped out for a pair of trainers.
Of course, you could also throw in a pair of sliders or flip-flops so you’ve got something really comfortable in the evenings.
Know // In our day-to-day planner, we recommend whether boots, sandals or trains are the best pick for that day's terrain so you know exactly what to put on that morning.
Travel Tip // If you’re bringing hiking boots, then you should 100% buy a pair gaiters to make them better-suited to the dunes.
While they may not win any style awards - and we personally have never used them - we saw a lot of people sporting these. We were told they did a great job of keeping out the sand, meaning they didn’t have to stop every few kilometres to unlace, empty out, and start again.


What To Pack For The Fishermen’s Trail
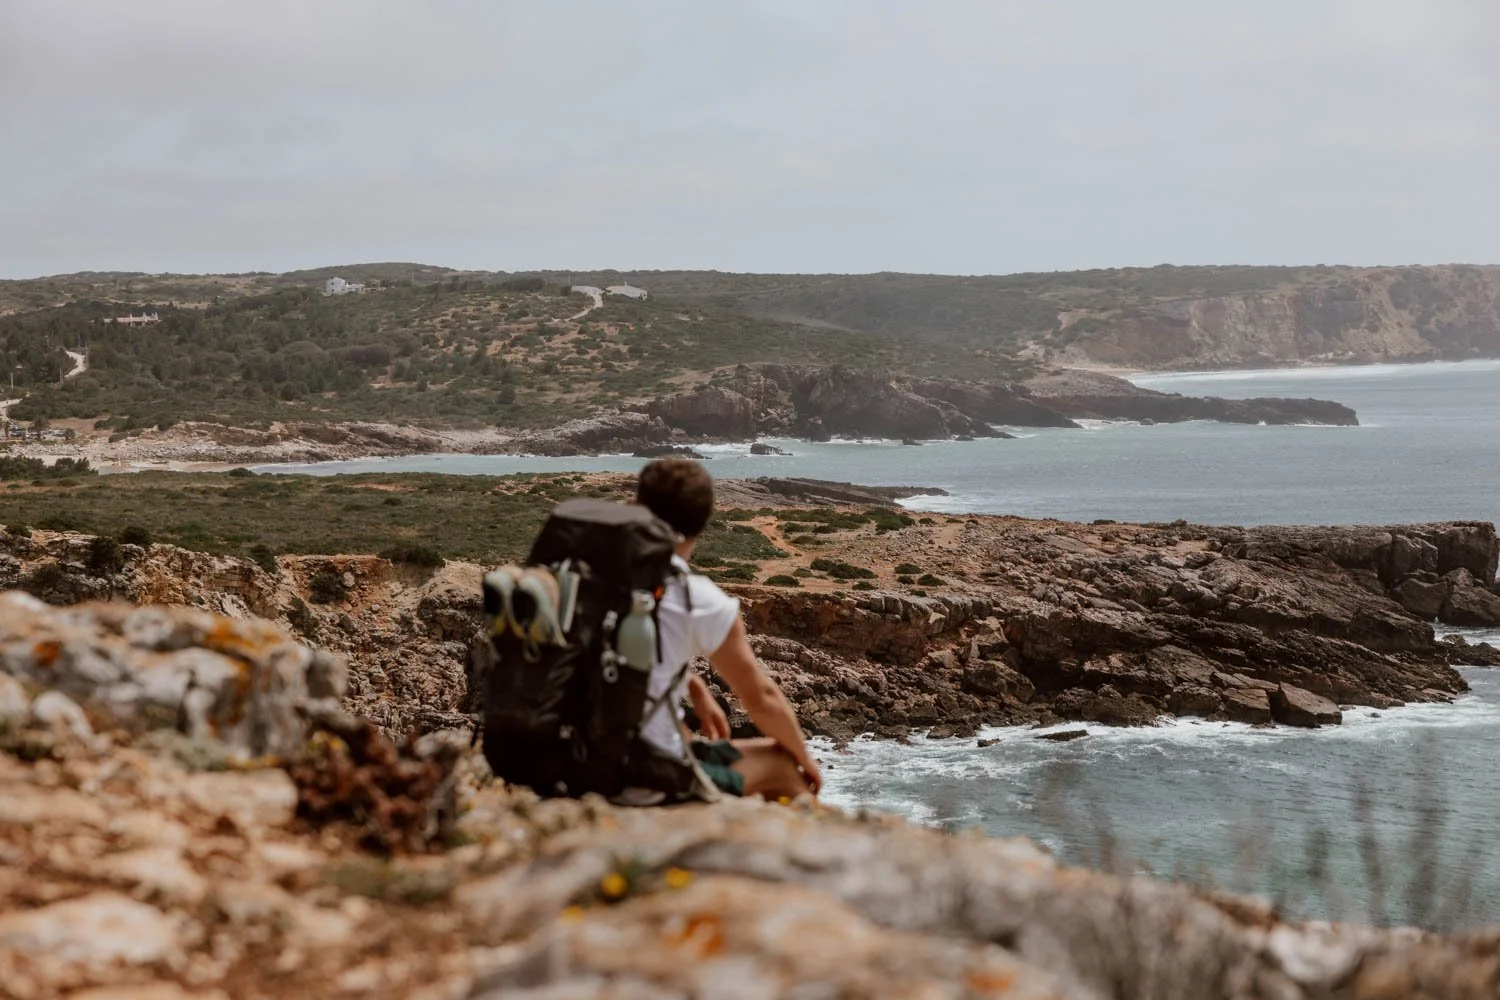
If it’s not already clear, then most hikers will have to carry everything they need on their backs for the whole walk.
One upside? If you’re doing the full Fishermen’s, you really don’t need to pack or carry much more than the Classic!
We carried everything in our 45 and 44 litre backpacks, with a base weight of 12 and 13 kilos respectively (i.e. before adding on daily food or water).
It wasn’t as bad as anticipated, and once our backpacks were on in the mornings, it was a signal to our reluctant bodies that it really was ‘go time’.
Based on our two weeks, the absolute essentials are: a well-fitted lightweight backpack, the two types of footwear, plenty of hiking clothes to last between sink/handwash laundry sessions, more socks than you think you’ll need, all your blister care paraphernalia, a baseball cap, some Tupperware, a spork, lots of suncream, sunglasses, Clif bars, a versatile fleece or jumper, versatile trousers, a small first aird kit, headphones, a battery pack, face wash, physical route map, a travel towel, rehydration tablets, chargers, one or two packing cubes, a Swiss army knife, a packable windbreaker, bin bag, and a big refillable water bottle (we LOVE our mint green Qwetch ones).
Everything beyond that depends on how much space you have and how much you want to carry for 100 to 250kms!
We have shared all our advice on the essentials to bring and what to leave back home in The Fishermen’s Trail Packing List
That post also covers whether you really do need to bring hiking poles or not.
Laundry along the way primarily depends on the accommodation you book. Most guesthouses and hotels don’t have specific laundry facilities, meaning you have to make do with the bathroom sink and soap - or the small bottle of detergent you smartly brought along - and drying it wherever you can.
If you choose hostels or Airbnbs however, you’ll often have a washing machine and dedicated facilities, and it’s smart to tactically book at least one of these on the 4-5 day route (and a couple if tackling the full trail).

Travel Tip // The thought of carrying your backpack for several days may be a deal-breaker, pushing the Fishermen’s Trail from ‘fun but challenging experience’ to a ‘miserable way to spend a few days’. Equally, some of you may be tagging a few hike days onto a longer Portugal or Europe trip, so need to figure out what to do with your suitcases!
Thankfully, there is the plan B of the Rota Vicentina luggage transfer service. It’s available every day in both directions between Santiago do Cacém and Lagos, with a transfer on a single official route section costing €20 (1-2 pieces of luggage included). Helpfully, they collect luggage from your accommodation and drop it off at the next one, but you don’t actually need to be present at collection, so your early morning start or hike plans aren’t interrupted.
All you’ll then need to carry is a light daypack with your essentials.
It’s unlikely to be a realistic option for budget travellers - but a great thing to know about in advance in case you’re struggling with the load.
If you’re really worried about the weight of your backpack or your ability to complete, then bear in mind that you will nearly always have an ‘out’. Although the trails lead you through remote countryside and coastline, you’ll actually never be too far away from a main road, a village, or a town - and most start and end points are well-connected by bus, with taxis available too.


We Need To Talk About Blisters
Emily is a frequent sufferer, but Andrew is fortunate enough to almost never get them on our hikes - that all changed on the Rota Vicentina.
No matter what footwear you bring, if you opt to do either of the multi-day routes, we reckon you’re about 90% certain to get one blister.
And, if you get one on a walk like this, you're almost guaranteed to get another one or two more due to the adjustment of your gait.
We were going grand for the first couple of days but, thanks to the dunes and the distances, both ended up with large, very disgusting blisters on toes, pads, and heels. So frequent were their appearances, that we had a definitive ‘new blister’ count at the end of each day.
These were the biggest contributor to the toughest moments across the two weeks, and we’re not exaggerating when we say they can make you thoroughly miserable and reluctant to take those first steps the next morning.
A wise Instagram follower had advised pre-hike us that “a pastel de nata a day keeps the blisters away”, and whilst that unfortunately wasn’t the case, we fully endorse you doing further scientific research - whilst packing more blister care supplies than you usually would, and have a basic idea of good blister management too (this article is great).
You can pick up blister plasters of varying quality from pharmacies and shops in some of the towns you'll stay in and pass through, but we highly recommend stockpiling these Compeeds in advance.

Fishermen’s Trail Accommodation
Speaking of accommodation, now’s a good time to discuss your options along the trails.
As mentioned, the sensible daily sections for the Fishermen’s Trail make planning your itinerary really easy and beyond a few minor potential tweaks, there’s no need to waste your time trying to create an original or bespoke route.
This isn’t simply because the daily mileage and timings (mostly) work out well, but also because there are usually no other accommodation options available between the small towns and villages where you start the day, and the small towns and villages where you’ll end!
In those accommodation hubs, you’ll find a good smattering of guesthouses, hostels, small hotels, and a growing number of self check-in Airbnbs, and they are all accustomed to Fishermen’s Trail hikers arriving for a single night and departing early the next morning.
We ended up staying in a real mixed bag - from the cheapest double in a big youth hostel and a house adapted for a dozen thrifty hikers, to a lovely private in a boujie surf lodge, a holiday cabin in a caravan park, and then the fanciest hotel in Lagos to celebrate the end of the Fisherman’s Trail.
There will be something to suit every budget and travel style, but options can become very limited due to there being only a handful of accommodations in some places; this is particularly relevant on the Classic in peak months.
Camping is not permitted on any of the trails, and campsites are not common.
Travel Tip // One aspect we found a bit of a pain is the late check-in times (4pm onward) for some accommodations, which was particularly frustrating if you’d set off early, made good time, and then have to hang around for a few hours before you can get into your room. This means you absolutely shouldn’t rush on certain days, and also embrace our version of post-hike ‘hanging around for a few hours’ involving several cold canecas of Super Bock and eating salty crisps in the sunshine.


Book Everything In Advance
Once we realised there was no need to spend time creating an original itinerary from Porto Covo to Lagos, we bought our one-way flight tickets to Lisbon and booked all our accommodation on a single Sunday afternoon.
Whilst you don’t have to do it all in a single day, we do highly recommend booking all your accommodation soon after you’ve finalised your dates and route.
This is especially important if budget is a consideration, and if your daily spend depends on the cheapest hostel rooms and dorm beds, then be aware that these can and do sell out months in advance; this won’t be a pressing concern if you’re hiking from November to February though.
The four main considerations when booking a place are:
How far is it off the route start/end point? Those extra kilometres seem like nothing when you book but are not fun at the end of a 25km day.
Does it have kitchen and laundry facilities? You won’t need them every day, but a place with a proper kitchen and washing machine is a dream some evenings - especially if you’ve run out of clean socks and need to prep something good for the next day’s breakfast or lunch on the trail
Will you be able to dry your clothes?
How late is the check-in time?
A quick look at the reviews will also let you get a pretty clear idea if somewhere’s decent from fellow hikers too.
Can you just wing it and find somewhere when you arrive? Personally, we think that would be very silly - and the last thing we’d want to do after walking all day (could you imagine the arguments?!). We did actually meet two women in Vila do Bispo who were taking that approach. We initally recommended our hotel but believe they were looking for somewhere more budget friendly - an hour later, at 6pm after a full day’s hike, they opted for our initial recommendation.
Plan | Find out exactly where we stayed and more accommodation recommendations for every budget in our Fishermen’s Trail Itinerary

Some Accommodation We Stayed in & Loved
Vila Nova de Milfontes | Sol da Vila
Almograve | HI Pousada de Juventude
Arrifana | The Lighthouse Hostel
Aljezur | Casa Rocha Relax in Aljezur
Carrapeitera | Casa Luminosa
Sagres | Casa Azul Sagres
Lagos | Avenida Hotel


Food, Water & Facilities
The unexpected joy of tackling the Fishermen’s Trail is the fantastic food and drink you’ll find along the way.
Tuna steaks the size of your head, , freshly grilled sardines, garlicky bar snack snails, a steady supply of sunshine yellow pastel de nata, and glass after glass of crisp white wine.
For the adventurous, perceves (goose barnacles) are a local staple that would cost you a small fortune anywhere else.
There are even a few restaurants we think you should base your timing around and view as a mandatory lunch stop on that section!
On a serious note though, food is fuel and it’s incredibly important on a long-distance, multi-day hike that you’re eating and drinking plenty throughout to keep energy and spirit levels up. On 20km+ days, you’ll need to eat more often throughout, rather than just wait around for lunch.
In terms of supplies, each town/village you’ll pass through and stay in has at least one small shop or supermarket. These tended to have a surprisingly plentiful and diverse selection of items most of the time, and we never struggled to find ingredients to cook up something for dinner or prep our packed breakfasts/lunches.
One half of Along Dusty Roads only hikes because it allows us to have packed lunches in beautiful locations, so we think Tupperware is an essential bit of kit to bring for the full Fishermen’s.

On certain days, you can’t guarantee that you’ll pass a shop, so always having a store of snacks to hand is essential (especially if you’re hitting a mental or physical wall). As we don’t like fake snack bars, and rightly assumed that we wouldn’t always be able to find good ones out there, we actually bought two boxes of Clif bars and some Nakd ones on Amazon to bring with us; this proved to be a really good decision, particularly on days where we didn't have time / facilities to make a packed lunch and on the days where the energy levels were low and we really needed that quick boost.
In our day-by-day planner, we’ve given suggestions on the sections where you should definitely breakfast or lunch at a notable cafe or restaurant, and the days you should bring a packed lunch.
Hydration is obviously key too - and we don’t just mean those bloody delicious mid and post-hike bottles of Super Bock and Sagres we’d guzzle down.
All tap water in Portugal is drinkable, and there are some taps and opportunities to refill along the way.
Our set-up was three one-litre refillable bottles (two insulated Qwetch ones and a Nalgene one), which we’d top up whenever had a source. We also made a point of stopping to buy or have a drink at most cafes we passed each day, as well as refilling our main bottles there if possible.
We suggest every hiker needs to carry at least two litres of water each day.
Remember that one litre equates to a kilo, and that extra water weight has to be factored into what you’re carrying at the start of each day!
Another travel hack we had was carrying a decent stash of High5 hydrations tablets. They weigh next to nothing, take up little space, and are a tasty game-changer after sweaty, sun-baked days on a trail.


Fisherman’s Trail Costs & Budget
The total cost for all our accommodation, food, and transport (both in Portugal plus flights there and back) was €2,142.
We spent €1,823 on accommodation and food for the two weeks, but this includes a very pricey night’s stay in a much more luxurious hotel in Lagos than we would normally pick - after all, if you can’t treat yourselves after hiking 250km, when can you?!
This works out at an average daily spend of €65 per day, per person for accommodation and food on the Fishermen’s Trail.
It’s important to add that those on more of a budget could absolutely bring that figure down to around €40 per day.
To give you an idea of where you could spend more, or less on your own trip, consider the following:
· This figure inlcuded a wide mix of accommodation types, from simple hostels, to really quite lovely guest houses and hotels. We booked our accommodation pretty short notice, so in several towns, we were left with just one or two places to choose between. Sometimes this resulted in us staying somewhere more basic than we would necessarily have picked, and sometimes meant we had to spent more on the bed for the night with no real alternatives.
If you need to spend less, then book accommodation as in advance as possible.
· We didn’t eat out for every meal. In fact, some days we packed our own breakfasts and lunches, and then made dinner for ourselves. Other days we chose to eat at a restaurant for at least one meal. This area of Portugal is relatively affordable, but if you think you’ll want to eat out more often, your daily budget could go up significantly.
· We stopped in a bar at the end of the day pretty much every evening, and had at least a couple of beers each (purely for their medicinal purposes, naturally). This added between €8 and €12 to our joint daily spend, which is included in the above average.
Travel Tip // Whilst many places on the trail now accept card, some don’t so you need to carry a decent stash of cash for day-to-day and emergencies. It’s best to do this before you travel from Lisbon on the bus as whilst every town on the trail has a ATM, many are the dreaded Euronet machines, and charge horrible withdrawal fees and offer crap rates.
Some Totally Random Fishermen’s Trail Hike Tips & Resources
· Make friends not enemies as you’ll see people each day and sometimes be staying in the same place!
· A nod, a smile, and a hello goes a long way amongst hikers!
· Always leave with a fully charged mobile phone
· Some days leaving early will be best (e.g. if you want time to enjoy the beaches along the way), and some days having a lie-in and leaving later is sensible
· Always check weather reports in case there’s going to be poor or hotter weather conditions, especially on the 20+ km days
· Make time up on the flat or asphalt
· For people doing the full Fishermen’s, you will have a few moments when you don’t quite remember why you’re doing this
· If you’re doing the trail on a budget, don’t be too stingy every day.
· Trust us when we say that you will want a private room and a comfortable bed occasionally, and somewhere with a washing machine.


Fishermen’s Trail Maps, Apps & Navigation
The trail is generally very well signposted.
You’ll spot the familiar green and blue markers on short wooden posts, daubed onto walls or rocks, and occasionally painted directly onto the ground or a lamp post. They’re spaced out just enough to keep you reassured - often with a small blue arrow pointing left or right when needed - so if you haven’t seen one in a while, there’s a good chance you’ve missed a turn.
Helpfully, you’ll often encounter an ‘X’ in the blue and green colours if you’ve gone off course.
At times, it feels like a gentle game of I-spy, adding a little treasure-hunt element to the walk.
Near the start and end point of each daily section, you’ll find a large Rota Vicentina noticeboard which details everything for that day’s section.
There are various sections where the full Fishermen’s Trail intersects or joins the Historical Way (marked red and white) or local circular routes (marked red and yellow) and it’s here that things can get a little confusing. Basically, you’ll have to follow the other trail markings until the green and blue reappear.
While the waymarking is reliable overall - and should be your main guide - we’d still recommend downloading the route on an app just in case (we used AllTrails).
HOWEVER, the issue with several of listings on thee apps is that the don’t always follow or reflect the official or newer daily sections route. Yet, having a downloaded AllTrails map as a reference point and guide helped us out on more than a few occasions.
It’s also worth noting that in several places the official route veers away from the coast. This can be frustrating if you’re keen to stick to the cliff’s edge, but those diversions exist to protect the landscape and prevent erosion. Following the marked trail here matters - even if a sandy goat path looks tempting!
Downloading an offline Google Maps for the area is also a good idea.
The official Rota Vicentina website is the best resource for stage breakdowns and more resources
Their €15 guidebook, available to purchase by the start point in Porto Covo, is a very handy addition for anyone planning to hike the full Fishermen’s Trail, whilst there’s also the Cicerone Fishermen’s Trail guidebook.


