How To Hike The Lost Waterfalls Trail, Boquete

Set within a private finca outside Boquete, the Lost Waterfalls Trail is one of the most popular activities in the area.
Also commonly referred to as Las Tres Cascadas (The Three Waterfalls), it takes travellers along and up a defined narrow dirt trail to three waterfalls tucked away in the dense cloud forest, with the second of them being legitimately magnificent.
The entrance fee of $10 is a bit toppy - closer to Costa Rica levels for this sort of experience - and may make some consider whether this should be an essential part of their Boquete itinerary or budget, whilst the steep and slippery conditions in a few sections may make it a bit too challenging for others.
In this short hike guide, we’ll share everything you need to know to make the right decision, as well as plan for The Lost Waterfalls Trail. We’ll cover timings, routes, costs, how to get there independently from Boquete, and the reason you should see the second waterfall first.
The Lost Waterfalls Trail Essentials
What / Popular trail near Boquete
Distance / 6km total circuit
Time / 2-3 hours
Difficulty / Moderate to challenging in sections
Trail / Signposted dirt + rocky ascent and descent
When / 8am to 5pm, last entry at 3pm
Cost / $10 USD per person
Wear / Hiking boots or suitable trainers essential
Bring / Water and rainjacket
Route / The Lost Waterfalls map
How To Get To The Lost Waterfalls from Boquete
The town of Boquete has a distinctive, rhythmic climate: bright, clear mornings give way to mist and rain by midday.
That’s why we recommend starting this and every other hike in the morning. Not only will it give you a better chance of bright, blue skies, but it also means muddy, rough, and rocky trails are easier to cover.
Thankfully, as the entrance gate for the Lost Waterfalls trail is only open from 8am, it doesn’t have to be a ridiculously early start to your day!
Public Transport
There are colectivos departing from Calle 1a Sur, outside the Casa Bruña supermarket (here on Google Maps), starting from 7am and 7.30am. It’ll have ‘Bajo Mono’ on the front, cost $2.50 per person, and the driver we spoke to said they leave every 45-60 minutes.
There are earlier departures, but it’s not necessary to arrive super early for this trail.
If staying outside the town (i.e. at the popular Bambuda Castle) at ask your hotel/hostel where’s the best place to stand on the roadside to hail it.
Depending on stops and how full it is, the journey time will be about 30 minutes and you’ll usually be dropped off outside the Tres Cascadas entrance (here on Google Maps). However, there is a chance that you’ll be dropped off earlier outside a yellow bus shelter (maps) next to the entrance for the Pipeline Trail; if that’s the case, you’ll just have to walk up the road on your right for 20-25 minutes (1.2km).
Don’t follow the sign for ‘The Waterfall’ trail, as that actually takes you to the Pipline.
Alternatively, a taxi driver will be delighted to take you to The Lost Waterfalls, and you’ll find them stationed outside the Parque Central (maps) - we were quoted prices ranging from $12-16, and it would be better for solo travellers to buddy up and share the cost.
Alternatively, ask your accommodation to arrange a ride on your behalf.
Plan / Our Boquete Travel Guide

By Car
We had a rental car for half of our month in Panama, and it was ideal for independently exploring the trails around Boquete.
It's a beautiful 25-minute drive out from the town: winding narrow roads over hanging bridges, past little fincas, and rose farms over the river. When you come to the what looks like the end of the road by the bus shelter (it's not, it curves round to the left), you'll see signposts for several hikes: Quetzales Trail, The Pipeline Trail, and The Lost Waterfall.
You need to take the road to the right after the bus shelter. Your GPS will send you that way, but it's quite an obscured road on first look, but there is a sign for 'Lost Waterfalls Trail - 1.2 kilometre'. It will take you up the narrow road right to the entrance.
Sidenote: rather confusingly, there’s a sign on the road straight ahead that says ‘Pipeline Trail’ and ‘The Waterfall Trail / ‘Cascada Escondida’ (there’s a hidden waterfall at the end of this trail hence the name) - this is NOT the road you take for the Lost Waterfall Trail.
There's not a lot of space for parking, with the best area being a small gravel lay-by on the right hand side of the road a little bit before the entrance (here on Google Maps). If that’s full, keep going and find a suitable place on the roadside - the challenge is getting tight in but not so tight that you end up stuck in the mud or precariously close to the edge!
If there are multiple cars, there may be a little bit of gridlock and confusion as everyone goes through the same mistake of thinking the road ends here (it doesn’t, and you can easily keep going past the entrance in order to turn around).
Note that, at the main entrance sign, you do not need to turn right and continue down as it’s a very bad road. However, those with high-clearance 4x4s can choose - or will be instructed - to go down there and park.
We’ve probably made that all a bit more complicated than it really is, but hopefully it saves some uncertainty/confusion on arrival.
If you’re considering a Panama road trip, then you can find our itinerary here and also read our absolutely essential Panama driving tips post.
Good to Know // As mentioned, The Lost Waterfalls hike is very close to the equally popular Pipeline Trail (where we saw a quetzal), so combining them into the same day trip from Boquete seems to make a lot of sense.
But it’s not as simple as that.
In fact, the daily rhythm of Boquete’s very specific climate (clear skies and crisp sunshine in the early mornings, then cloud and rains rolling in from around midday) means all hikes are best done in the morning, with anything started in the afternoon having a significant chance of being wet and grey. Therefore, a better idea is to do the Pipeline and Tres Cascadas on separate mornings.


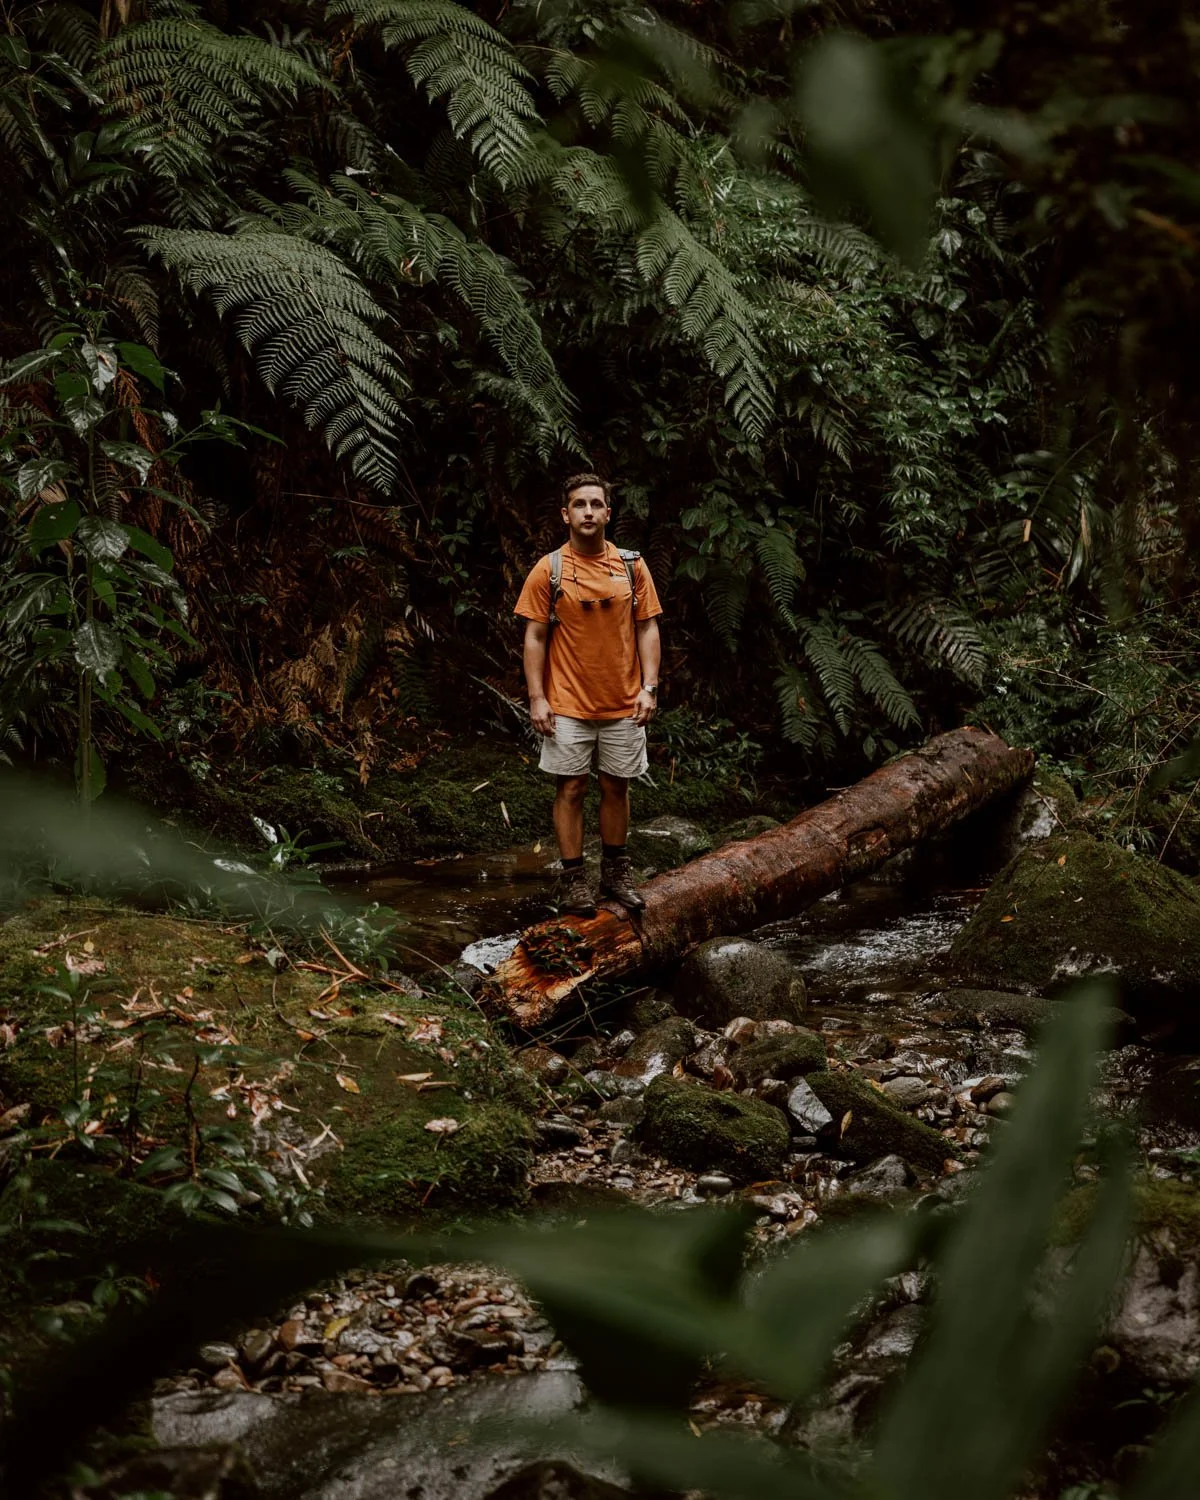
The Lost Waterfalls Trail | What To Expect
Beyond the three waterfalls, much of this is a joyous walk beneath a thick forest canopy, surrounded by ferns, vines, and birdsong.
The manageable distance of just 3km each-way is slightly deceptive though due the type of terrain and topography.
For experienced hikers and fit travellers, it won’t pose many issues except the chance of a slip or stumble on the rocks. For others, the near-constant ascent from the start involves some very steep, uneven parts, and will prove tiring as well as increasing the overall difficulty rating.
That said, it should be perfectly manageable for most if you adjust your pace and timing expectations!
A more serious obstacle is the short but steep, slick section with ropes after Cascada #2 leading to Cascada #3. Those without the right footwear or who are less mobile may have to avoid it and content themselves with only seeing Cascada #2 and Cascada #1 (we actually met one elderly couple who only ended up only seeing one waterfall because of their concern about the rope section and another descent toward the end!).
The good news is that there were also several older travellers who tackled the ropes with no issues and big smiles on their faces!
So, although we wouldn’t frame this as a challenging or technically difficult 6km round-trip hike, the reality is that some people will find it more challenging and tiring than others due to the nature of the trail between the second and the third waterfalls.
Is it worth the $10 entry? Probably not, but we’re also the sort of people who get quite pissed off whenever we have to pay to hike and so we’ll leave that verdict to you.
Half the price would feel fairer, but it is a rewarding walk.
If you're really very concerned about fitness or mobility, this hike might not be the best one to prioritise in Boquete (and the nearby Pipeline Trail may be more enjoyable). However, we’d always encourage you to give it a go if you’ve done the research and prepared accordingly!
One final thing to note in your prep: if there’s been any rain, it going to be quite damp and slippy underfoot throughout. Unless there’s been a spell of dry conditions, we’re really not sure how enjoyable or safe The Lost Waterfalls trail would actually be during Boquete’s rainy season (April to November).
Either way, we think hiking shoes are a year-round essential.
The Lost Waterfalls Route
The Entrance
Once you’ve parked or been dropped off, follow the signs down to a little hanging bridge and cross over. From there, it’s a steady climb until you reach the black gate with a few signs informing you that it’s private property and paid entry. Before 8am or after 3pm, it’ll probably be locked.
After the gate, it’s a few minutes’ walk up a rocky, slippy trail with a wooden handrail to the official entrance cabin, which may or may not have a few lovely dogs hanging around. On our visit, there was a very professional lady at the kiosk - who spoke English and Spanish - and everyone has to sign in, pay $10 USD (cash), and receive a ticket.
She also gave detailed instructions on the route with her handdrawn map, including the main piece of advice to skip Cascada #1 and go straight to Cascada #2 and #3, saving #1 for the way back (more on this below).
Note: despite the entrance cost, there are no bathroom or other facilities available. There is a little stall you’ll pass at the beginning and end, and it’s a nice idea to buy a banana for 35 cents or browse the souvenirs when you’re leaving.


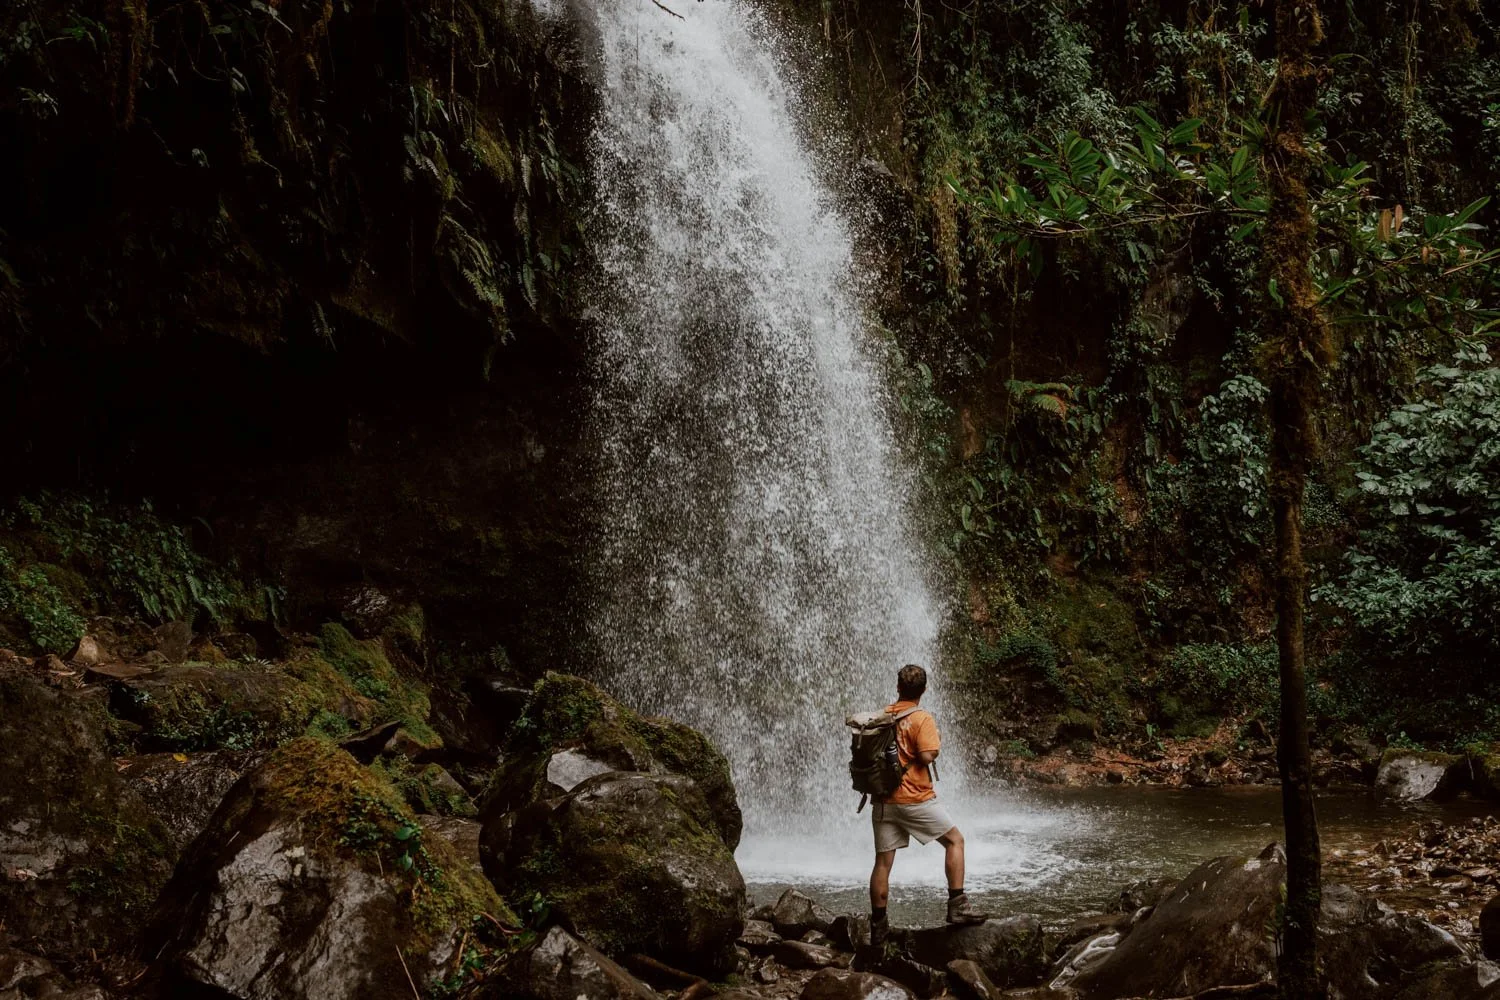
Going Up To Waterfall #2 and #3
From here, it’s just under 10 minutes until you arrive the first signpost where, if you haven’t paid attention to the lady’s explanation, you could quite easily go wrong.
The official recommendation for The Lost Waterfalls Trail is to go left at the first signpost, following the green arrow with yellow text saying 'Cascada Number Two', not following the red arrow pointing right to ‘Cascada Number One’.
As this involves going to the ‘first’ waterfall last, and the ‘second’ waterfall first, it can lead to understandable confusion, but it’s actually quite clear once you’re on the path and see the signs.
Taking the left, it’s an ascent on stones, logs, and man-made branch steps.
A few minutes later, you’ll reach a fork with another green sign with blue text pointing downwards to the first waterfall: ignore it and follow the other green sign with blue text pointing left and up to the second waterfall.
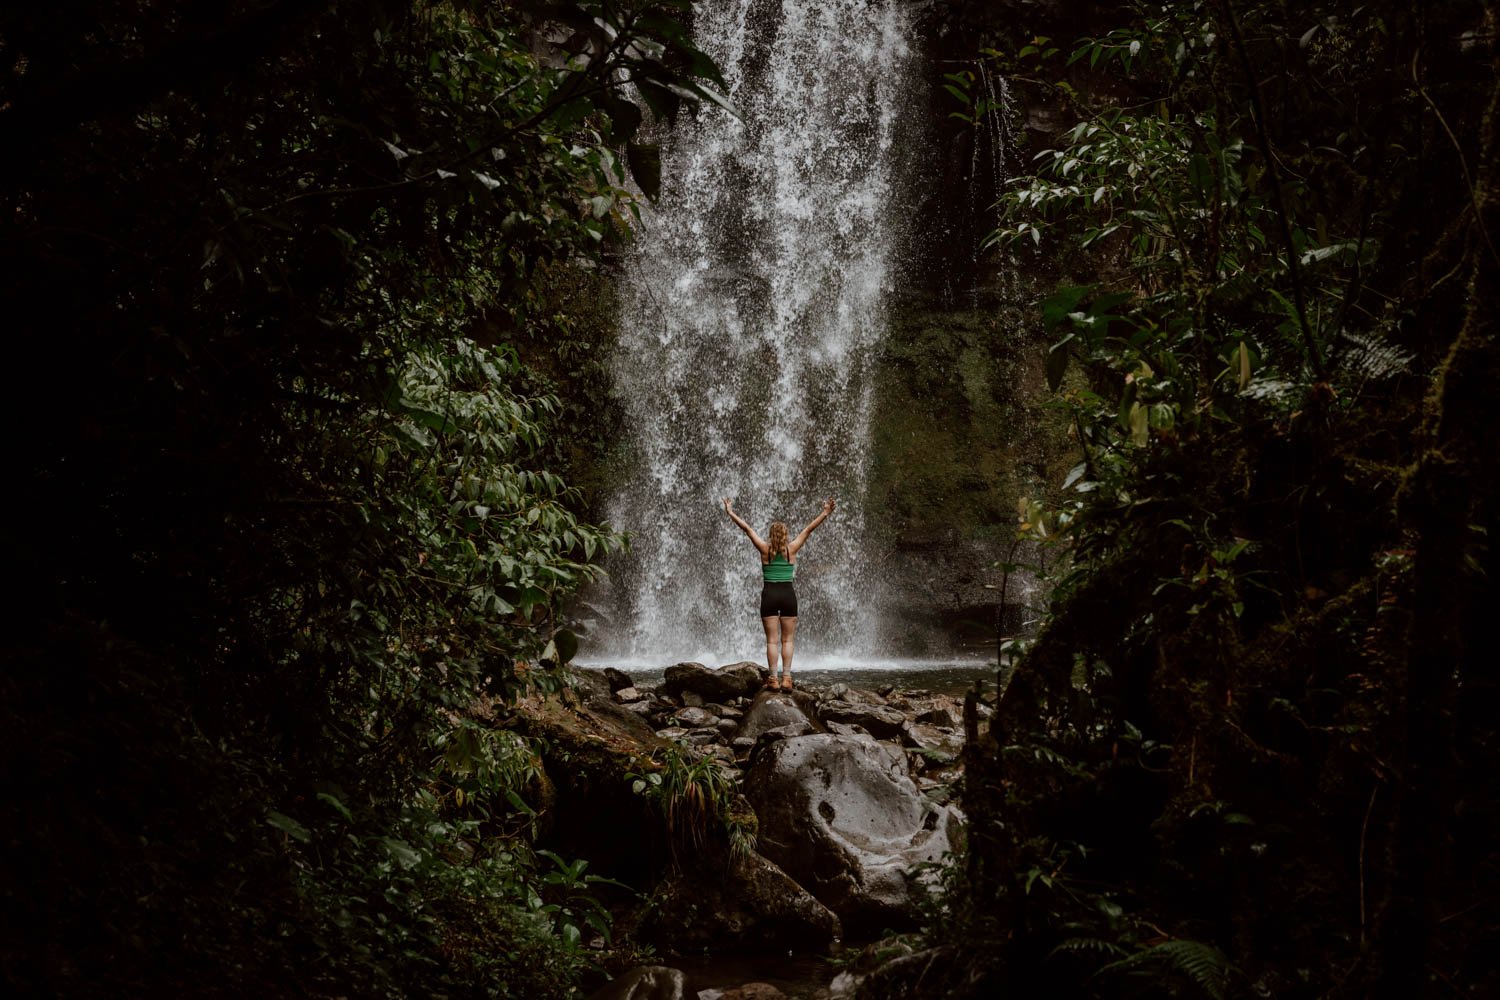
You’ll hear the rush of waterfall first, and when you actually come face-to-face with its glorious, thundering power, it’s quite the moment. This is also the appropriate spot for a break and some photos, whilst the brave amongst you can absolutely go in for a (brief) very chilly dip.
It took us about 25 minutes from the entrance cabin.
After you’re done at Cascada #2, the trail becomes much more challenging: a lot more up and down, rope climbing, and plenty of muddy places where you could potentially slip or trip.
The most difficult part is the sheer rock section, which is the ‘rope climb’ part we’ve referred to a few times. Whilst the going up isn’t too bad, it’s the fact that everyone also has to go back down it that causes issues. In short, don’t go up unless you’re absolutely certain you’ll manage to do the down!
There’s also only room for one person at a time, so it can become a bottleneck, and patience is essential to ensure everyone executes it safely at their own pace.
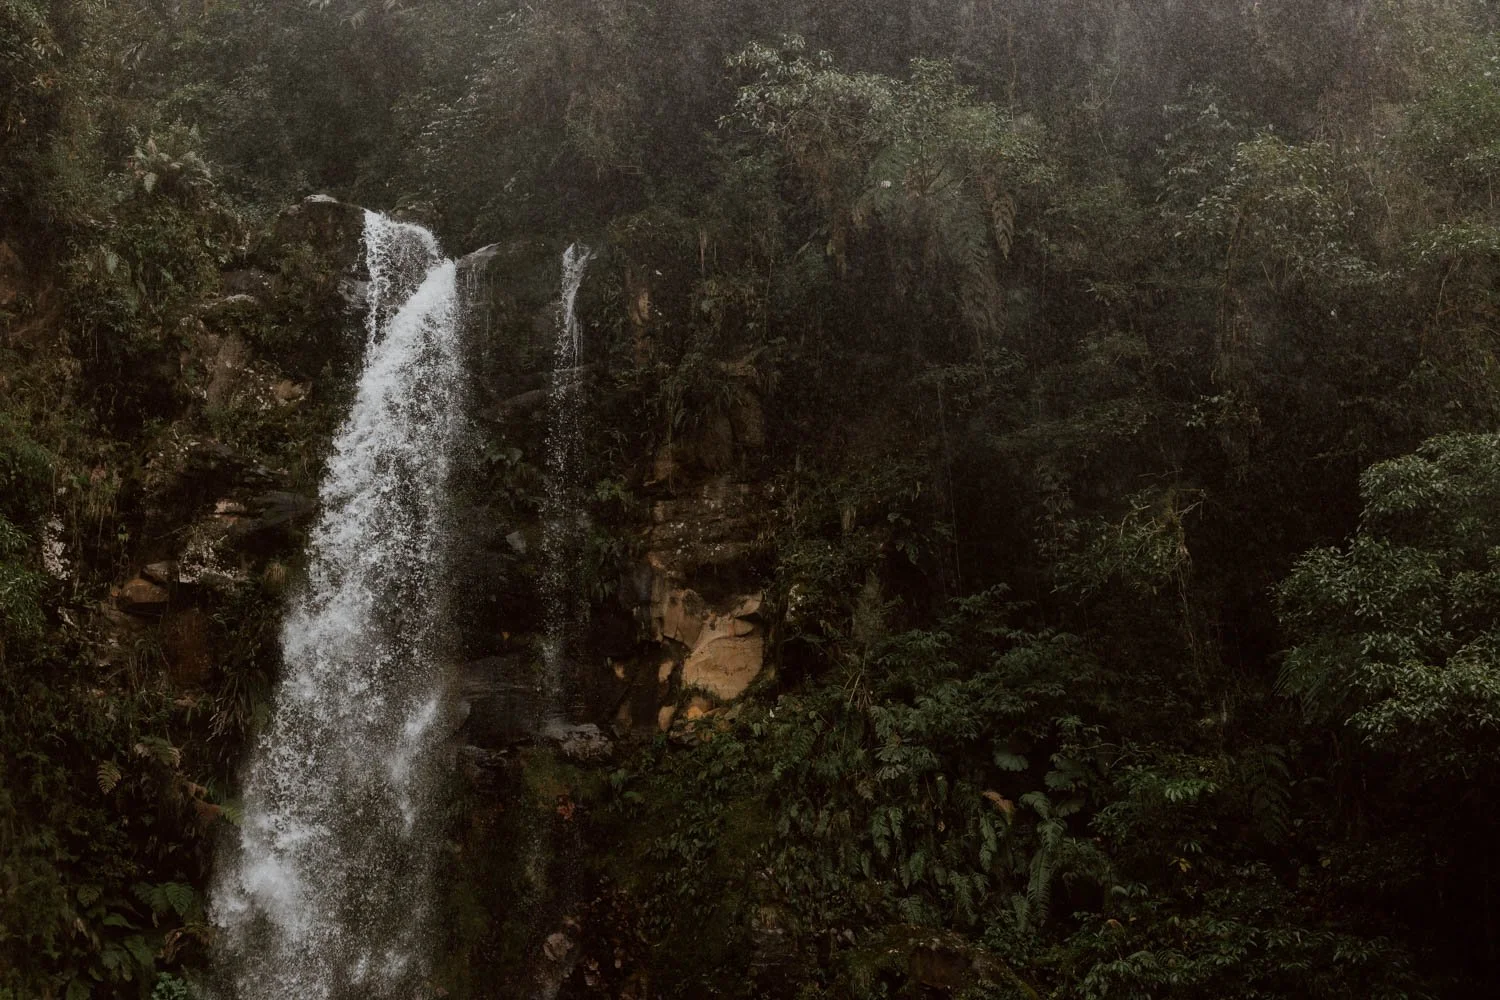
The trail then winds up and around the hill, becoming quite narrow until you arrive to at Cascada #3. It’s smaller and less impressive than the second, but the secluded setting and more adventurous walk make it well worthwhile.
It took us just under 30 minutes to cover the 1.4km from the second waterfall to the third.


The Return & Waterfall #1
Once you’re done at Cascada #3, it’s time to turn around and follow the same trail back.
As mentioned, this leg is the most challenging, and you really do need to go with extra care in parts. It would be very, very painful - not to mention catastrophic - if you had an accident on that rope section. We suggest that it’s going to easiest and most stable for some people to go down that section backwards, very slowly.
After around 45-60 minutes, you’ll have returned to the same fork in the road from earlier in the trail, and you should now follow the sign left for ‘Cascada #1’. It's a steep and very slippy walk down some man-made wooden steps with ropes and handrails, taking about 10 minutes.
This waterfall is slender, with a small viewing area and lots of pink flowers. It’s the only one of the three that you cannot access or swim in (if you’ve brave enough for the others) and, whilst pretty, it does lack some of the drama.
However, our view is probably coloured by the fact the afternoon Boquete mists and rains had rolled in, so everything was a bit overcast and wet; if you’re tired or short on time at this stage, you wouldn’t miss much by skipping it.
To end the trail, simply follow the path that was on your right as you came face to face with the waterfall, and it will lead you back to the main path.
From the cabin to the road, it’s about 10-15 minutes.
The Stats & Maps
On the round-trip from the entrance cabin, we walked 6km in total and it took us just under three hours at a very gentle pace.
The sign at the entrance cabin says you need two hours to do a complete circuit, but we’d suggest 2.5 to 3 hours is more realistic once you’ve factored in photo stops, swimming, and breaks to enjoy the setting.
Remember to also factor in the 5-10 minute walk from/to the road to reach the cabin.
The route we followed and outlined above is the official and recommended circuit of the Lost Waterfalls trails, which takes you to Cascada #2 first and Cascada #1 last; the downloadable route map available here on AllTrails differs slightly in that it takes you down to Cascada #1 first.
Lastly, if you’re hoping to do the walk but concerned about the more difficult section between the second and the third waterfalls, remember that it’s easy to adjust the route and just visit the first and second waterfalls (the latter of which is the real highlight).


What to Bring
In terms of footwear, we think hiking boots are most appropriate. These are an essential for travel in Panama and Central America more generally, but for the Lost Waterfalls trail, they’ll minimise the risk of injury and deal best with the mud and slick, slippy rocks.
However, there were plenty of travellers on this trail wearing sports trainers. If they’ve got decent grip, they’ll do the job, but your ankles won’t have as much protection (and you definitely shouldn’t wear your favourite white pair).
As with all Boquete hikes, stick a rain jacket in your day pack, especially if starting later in the day.
Hiking poles aren’t necessary, but if you’re travelling with a pair, by all means bring them along for extra stability and support.
If you’re going swimming, stick a travel towel in your daypack and remember the water is really, really chilly.
There are no shops in the area, so be sure to bring plenty water and any snacks. We had our trusty Water-to-Go filter bottles, which we filled up several times along the trail. They’re a great piece of travel kit that we’ve used for the last ten years, and you can get a wee discount if you use ‘ADR15’ on the official website.
You’ll need cash for the entrance, transport, and incidentals.
A few other essentials to consider packing:
· Insect spray (we use plant-based Incognito)
· Suncream
· A layer
· Fully-charged mobile phone
· Battery pack if you have one


