How To Hike Bobotov Kuk | Montenegro’s Highest Mountain
There’s something fantastical in the name of the peak that defines Durmitor National Park.
Bobotov Kuk.
It could be a wizardly exclamation - Bobotov Kuk! Did you see what that man just did? - or the moniker of a medieval usurper banished to windswept Balkan hinterlands, where his days are spent broodily plotting revenge and ruminating over long-held grudges.
Weirdly, we both loved saying it at random intervals on our road trip.
Linguists may put it down to the ‘Bouba/Kiki effect’ where, across cultures and languages, people tend to match rounded sounds like “bo” with soft, rolling shapes, and sharp sounds like “kiki” with spiky, jagged forms. Say it aloud and you’ll understand instantly: Bo-bo bounces like the gentle curves of the valleys, while the final KUK! snaps as sharply as the peak itself.
In a wonderfully nominative-deterministic way, the name of the Montenegrin mountain doesn’t just sound like the Bouba-Kiki effect, the route to the summit sort of mirrors those contrasting sounds too: a start of rolling, grassy ups and downs that lulls you into a false sense of ease, abruptly giving way to a half crown of dramatic, jagged peaks rising out of the scree.
Widely accepted as Montenegro's tallest mountain at 2,523 m (8,278 ft) - though geographical quirks and a mere twelve metres mean it can also be demoted to fourth place - hiking Bobotov Kuk was a first-draft entry on our Montenegro itinerary.
It almost certainly should be on yours too.
Unless you have vertigo.
Or don't like heights.
Or are really unfit.
Or really aren't a fan of going along a narrow ridge with just a cable on the cliff face preventing you from taking an unplanned flight into the valley below.
Though a pretty accessible and achievable hike overall, Bobotov Kuk is not here to mollycoddle you. It’s tall, steep, often windswept, and utterly indifferent to your fears or fatigue. But, the rewards it reluctantly offers anyone foolish or foolhardy enough to climb its silver sides are, quite frankly, remarkable.
We genuinely thought this 9.5km hike was magnificent.
In this guide, we're going to share all the planning and practical essentials you need to know reach the summit of Bobotov Kuk in Montenegro. From the best route and transport out there to our thoughts on conditions, difficulty, the kit you need, and a realistic take on those cables near the summit, this has (almost) everything you’ll need to plan and prep for hiking Bobotov Kuk.
We also have one golden piece of advice for any travellers who are genuinely concerned about whether they’ll be able to do that potentially treacherous final stretch to the summit.

The Bobotov Kuk Essentials
Popular 9.5km hike in Durmitor National Park
Out-and-back trail is challenging to difficult, but no guide required
2,523 metres high, approx. 850m elevation gain
Significant risk of vertigo on technical final summit ascent
Main trail starts + ends at the Sedlo Pass - here on Google Maps
Car, taxi, or shuttle bus transfer required - or hitch a ride
Start early + allow 6-8 hours to complete
Condition checking is essential, even in peak summer.
Best done from May to October
Park entrance fee of €5 required
No facilities - bring layers, good footwear, and food/water
See map + route profile here on AllTrails
Stay in Zubjlak at Hostel Hiker’s Den or Casa di Pino - or nearby at The View
The Two Bobotov Kuk Hiking Routes & Difficulty
Durmitor National Park is a UNESCO World Heritage site covering over 39,000 hectares in northern Montenegro. Arguably the most famous of the little country’s five national parks, it’s a year-round hub for hiking, rafting, skiing, and climbing.
The relative ease of accessibility and established tourism infrastructure, as well as the sort of scenery on offer, makes Durmitor a popular choice for those who aren’t even visiting Montenegro for its hiking; thousands head up there on day trips or overnight stays from the popular coastal destinations of Kotor and Budva (both three to four hours away).
For outdoorsy types and road trippers, Durmitor is a must-visit for at least a couple of days, and one of those days will end up being wholly dedicated to hiking Bobotov Kuk. This isn’t just for the accolade of conquering the highest peak in Montenegro; indeed there are hikes like that which really aren’t worth taking a day out of your trip just to secure bragging or bagging rights.
The reason you should make the effort to go to the tippy top of Bobotov Kuk is because the scenery is absolutely stunning all along the way.
There are two hiking routes to the summit of Bobotov Kuk:
1 / The Sedlo Pass route is the most popular. An out-and-back that covers a total distance of around 9.5kms, with approx. 850m elevation gain. It should take anywhere from 6-8 hours depending on pace, breaks, and time spent at the top - and we effusively recommend it.
Starting amongst the open mountains, it’s the most scenic route of the two as well as the shortest.
The only downside is you require transport to get out there and back (don’t worry, we’ve covered your options below).
See map + route profile below and here on AllTrails
2 / The alternative route starts in the little town of Žabljak, which most travellers use as their base within Durmitor National Park, and takes you up via the Black Lake. However, there are several reasons why we think the vast majority of people should instantly discount it:
· the elevation gain is about 300 metres greater
· it’s significantly longer (by at least 10km) and much more challenging
· the two routes converge before the summit
· you’ll miss the remarkable first half of the other route
So, trust us and just focus on doing the shorter trail that we did from the Sedlo Pass to Bobotov Kuk.
Know // In our pre-hike research, we were confused about why Bobotov Kuk is almost always referred to as Montenegro’s highest mountain. At 2,523 metres, it comes just a smidge below a trio of peaks in the Prokletije / Accursed Mountains: Zla Kolata (2,535 m), Dobra Kolata (2,528 m), and Rosni Vrh (2,524 m).
As these straddle the border with Albania, Bobotov Kuk is the highest peak entirely and exclusively within Montenegro - and when you speak with some locals, you’ll realise why that distinction is very very important.

How To Get To Bobotov Kuk, Parking & Entrance Fees
As mentioned, most travellers use the little town of Žabljak as a base within Durmitor National Park.
It’s two hours away from Podgorica or three to four from Budva and Kotor - find it here on Google Maps.
Whilst Žabljak is nothing to write home about, it’s easily accessible by bus, situated a walk or short drive to trailheads, and has most of what you’ll need. We stayed at Hostel Hikers Den, which skews younger and is one of the popular options for backpackers, making it a great option for solo hikers looking to meet up with people.
It also has a shuttle bus to the Bobotov Kuk startpoint.
However, it definitely won’t suit all couples or travel styles: Hotel Soa, Casa di Pino EcoLodge Hotel, and Guest House Durmitor Paradise are highly-rated alternatives in Žabljak.
Žabljak to Bobotov Kuk
The hike starts next to a car park that’s a 14km / 20-minutes drive outside Žabljak - find it here on Google Maps.
Unfortunately, there are no public buses, so those without a rental car have the following options to reach the start point of the Bobotov Kuk hike:
· one-way taxi for around €15 to €20 - there are plenty in town and it makes sense to share with others
· find a seat on a shuttle bus
· hitch-hike
The only shuttle bus transfer we’re personally aware of is operated by Hostel Hikers Den, departing at 9am and costing €5 per person. Personally, we think it should leave earlier, so a shared taxi may be better for some guests. Note that their shuttle is only available one-way, with everyone expected to hitch a ride back from the car park; thankfully this is common and easily done, and we picked up three hikers on our way back.
If any of you are thinking of simply walking back to Žabljak via the alternative hiking trail, we can only say that everything we were told and have read doesn’t make that sound like a good option.
Changes / If taxi prices increase or you find alternative shuttle bus options, let us know in the comments and we’ll update the post.


Parking for Bobotov Kuk
For anyone driving to the start point, note that the trailhead and car park marking the beginning (or end) of the most scenic southern stretch of the Durmitor Ring Road. The final part of the 20-minute journey there from Žabljak involves a narrow, curving single-track road - a signature of this area - and it’s one to take slowly and with care.
The rough car park at the trailhead is free and fits around 30 well-parked cars but, as campervans often stay there overnight, space can be more limited.
We start most of our hikes early to avoid the crowds and have the best conditions, but it also increases your chances of finding a parking spot on popular routes. We arrived at 7.20am to find it almost empty; two days later, passing by at 9.30am though, it was completely packed. As this road and car park are also used by people stopping on the Sedlo Pass for photos and arriving from / departing for Piva Lake, then you should expect it to get busy or full after 8am.
The good news is that starting earlier doesn’t just improve you chance of getting a space, but it will give you a less crowded route, cooler temperatures, and a view of that glorious soft light sunrise scene from the car park.
If you turn up and the car park’s full, just continue along the road and you’ll soon see slivers of space on the roadside that act as unofficial overflow parking. If you’re not comfortable parking on the first bend, then carry on a little further where there’s a longer, wider, more obvious stretch to pull up on the left side (here on Google Maps). As it’s a busy road, do try and park up as tight to the side as you can.
Lastly, those with a rental car should keep an eye out for fellow hikers hitching a ride back to Žabljak, and accrue some easy good karma points by giving them a lift.
Travel Tip // For those with a rental car, we actually think staying outside of Žabljak is an option to seriously consider (we wish we did for a few reasons) and there are an abundance of wonderful little A-frames and chalets with views over the National Park. We’ve covered more in our main Durmitor Guide, but a handful of our favourites are Black Stone Durmitor, PeaksView Chalet One, Mountain Homes Durmitor 3, Bosacha, and Pitomine.
For ease, there are also several cabins situated just a five-minute drive from the trailhead, including the highly-rated Etno selo Smrčevo and The View.
For anyone travelling with a campervan or RV, we suggest not staying overnight in the car park and instead setting up for the night just a little bit down the road (here on Google Maps)
Plan // Considering a road trip? Then you definitely need to read 15 Things To Know Before Driving in Montenegro

Bobotov Kuk Entry Fees & The Annual Pass
As it’s within Durmitor National Park, you’re technically required to pay the National Park day entrance fee of €5 per person to hike Bobotov Kuk.
This fee will also cover you if you’re visiting elsewhere within Durmitor on the same day (i.e. the Black Lake).
The reason we say ‘technically’ is because when we arrived and started walking, there was nobody around to check our Annual Passes or pay in person. Passing by two days later at 9.30am though, there was a man at the car park entrance checking and charging tickets, whilst we’ve also read that the attendant may be stationed just up the hill at the start.
So, whatever time you’re hiking, make sure to bring cash for this or pay the €5 entrance fee online on the official website.
Travel Tip // As outlined in our Hiking in Montenegro and 23 Things To Know Before Visiting Montenegro posts, if you’re spending several days in Durmitor and/or visiting more than two national parks in Montenegro, it’s worth buying the Annual Pass.
It’s fantastic value at just €13.50 per person and offers unlimited entry to all five of Montenegro’s national parks.
You can purchase it quickly and easily on the official website (as we did) or in person at the entrance kiosks.


The Bobotov Kuk Hike Route
Based on our experience, the terrain, difficulty, enjoyability, and the chances of saying 'oh shit, I need to turn back' differential, we think the route is best split into three sections.
We’d suggest 3-4 hours for the ascent and 3-4 hours for the descent (including a few breaks), so the 6-8 hours for whole hike; note that all our times are purely indicative though and it can absolutely be done quicker or slower. Be aware however that the tourist office in Zabljak told us (with out any idea of how fit - or unfit - we were) that this hike could be done in five hours - unless you are really motoring along and well used to alpine hikes, this would be almost impossible for the vast majority of people.
Also, factor in that most will want to spend about 30 minutes up at the summit.
Given the length of time, this is why starting this hike before 10am is a very good idea.
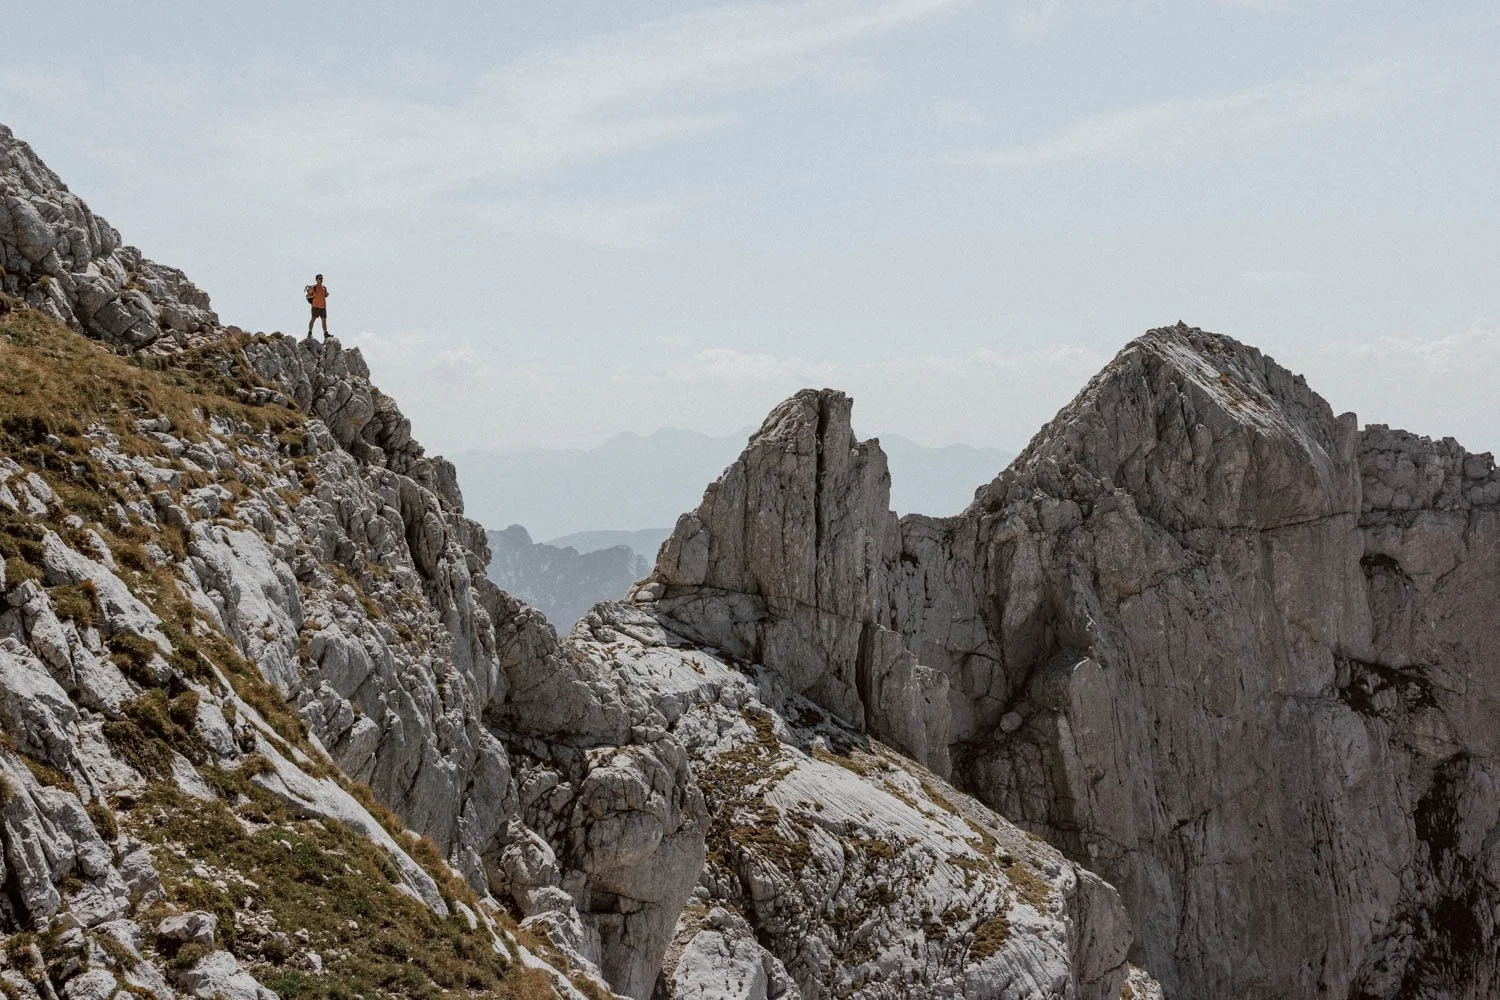
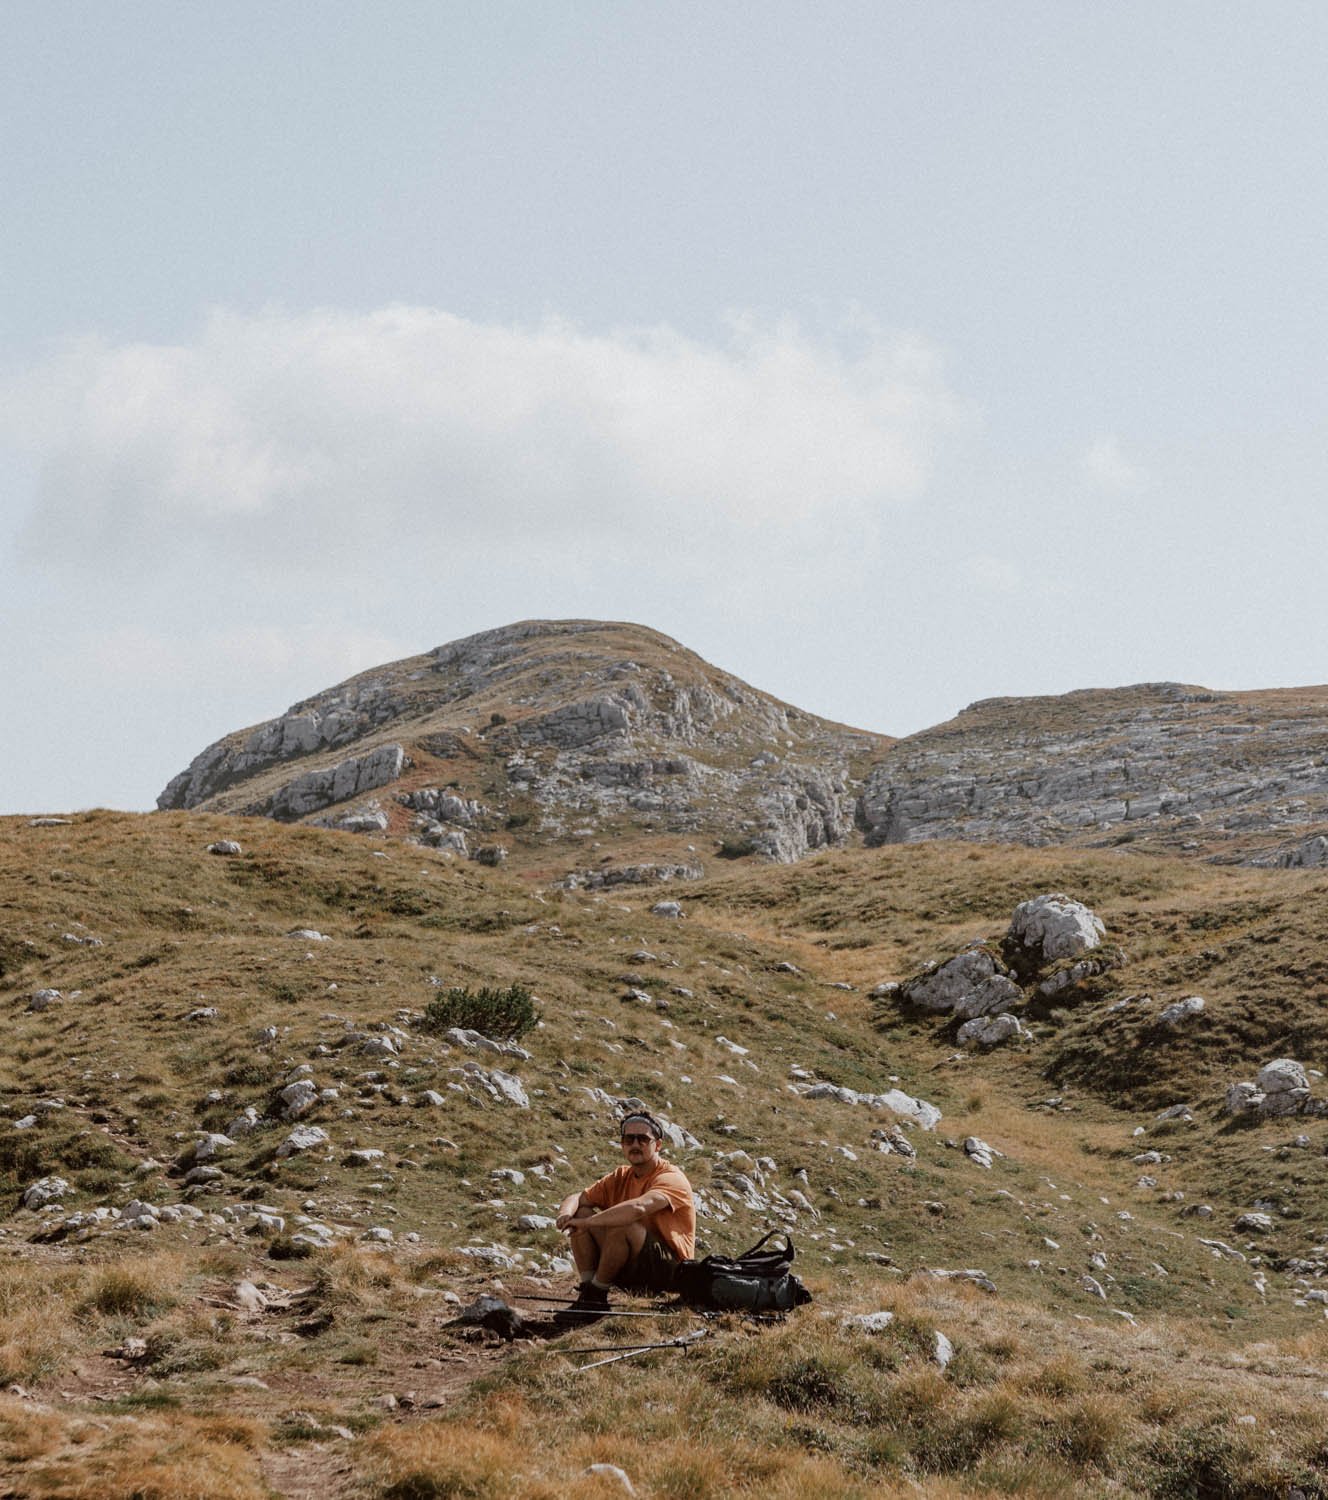
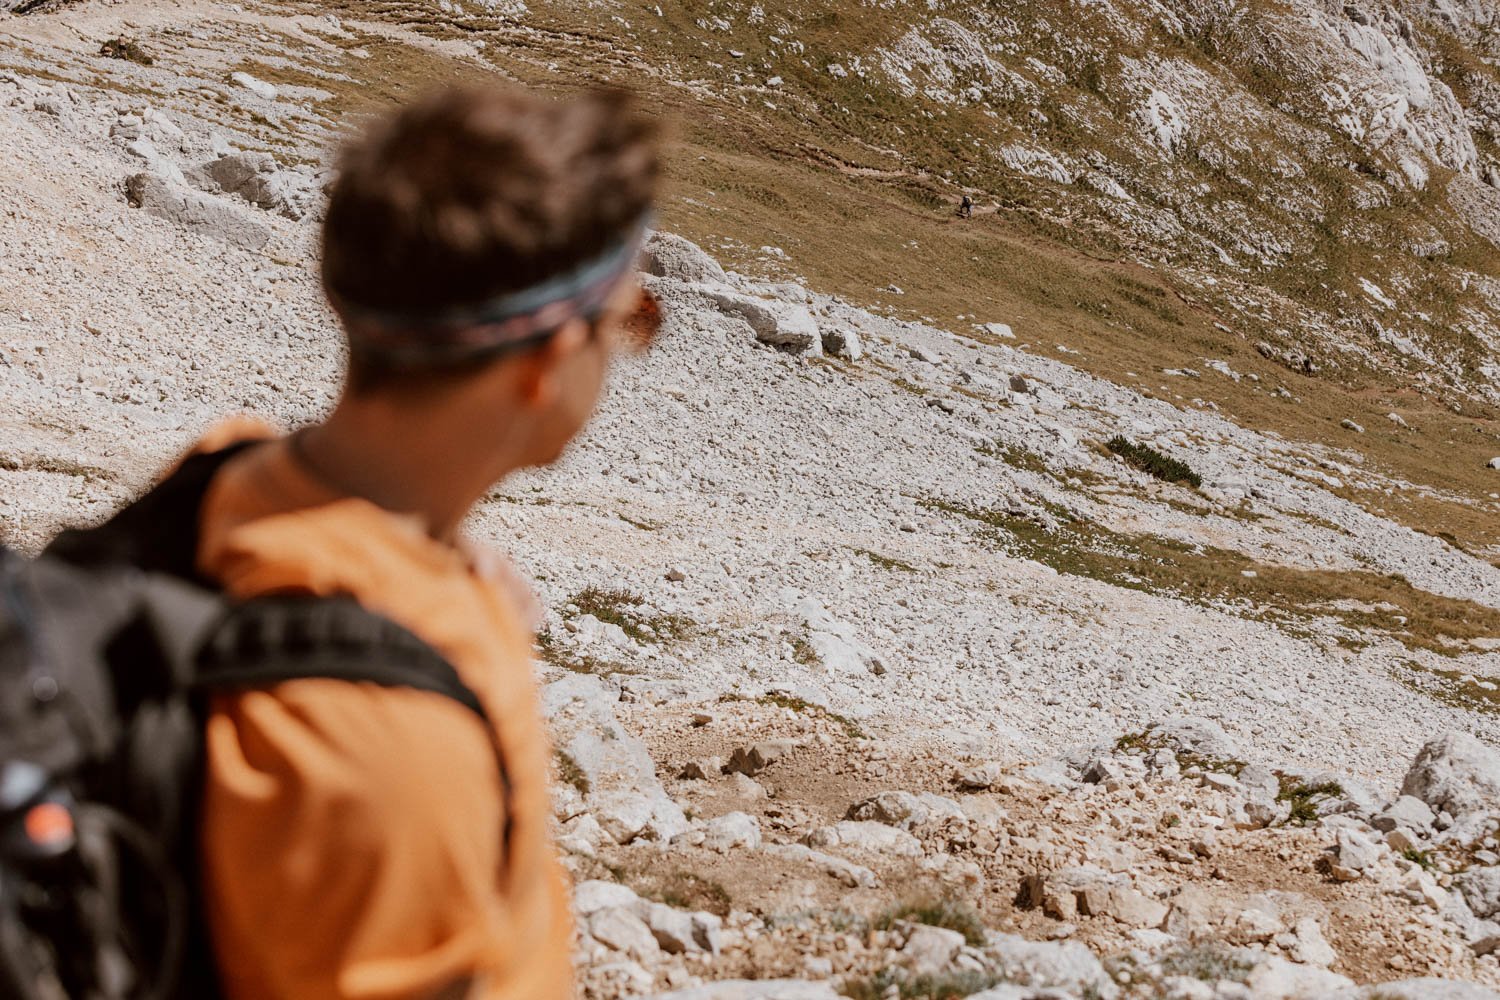
1/ The Start & The Valley | 1.5 - 2 hours | Easy to Moderate
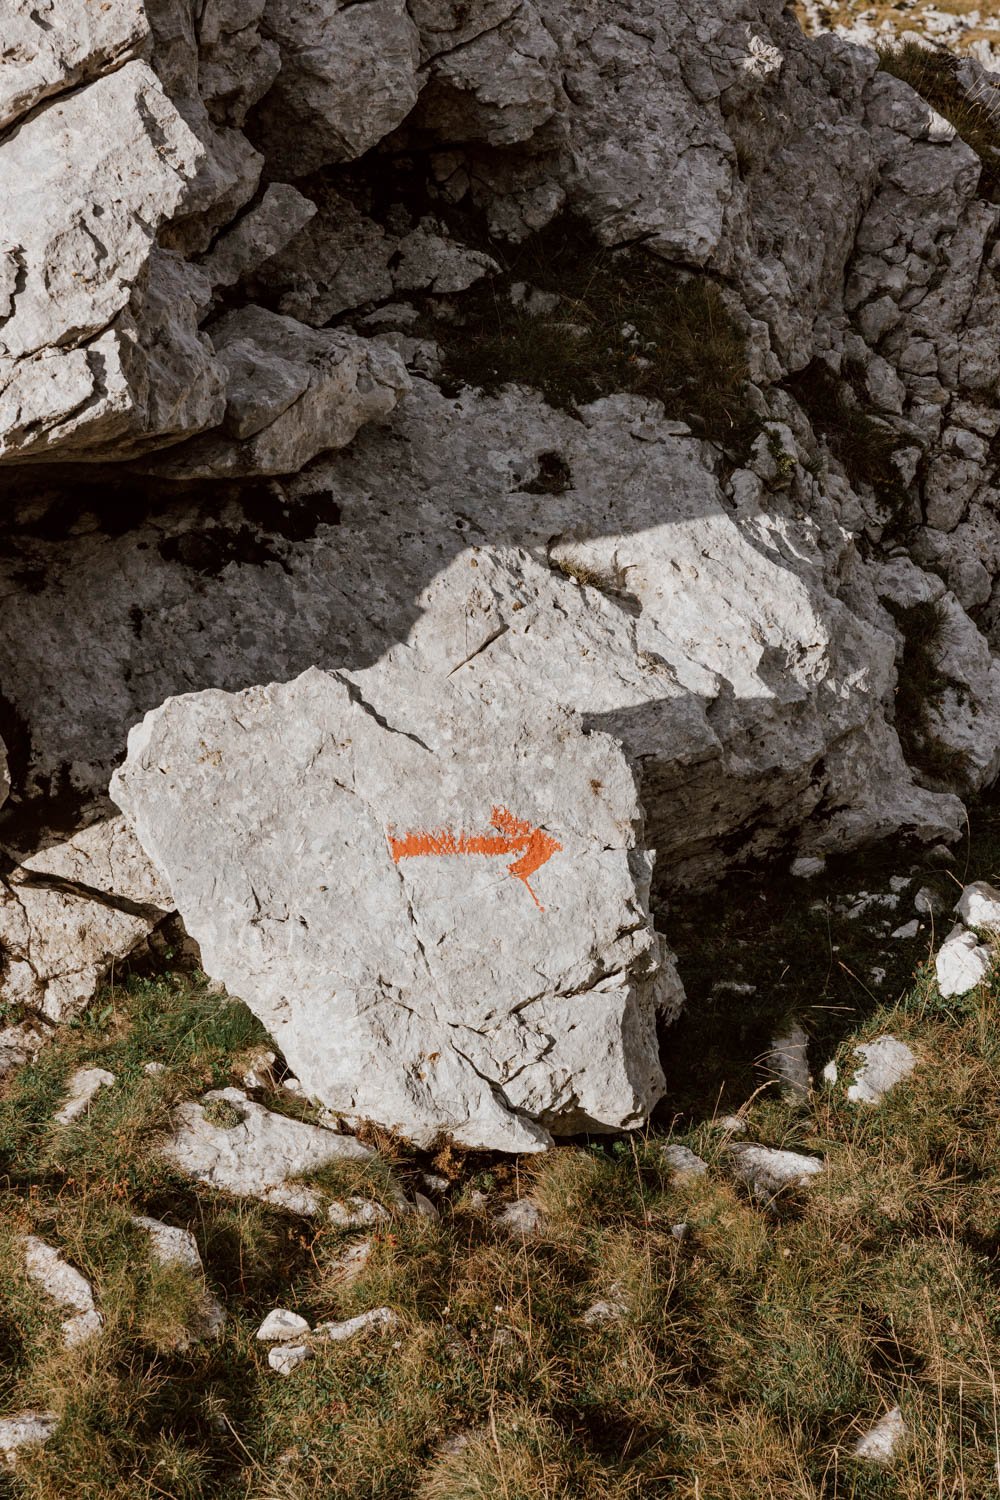
After you’re done taking in the views from the car park (here on Google Maps), head along the path through the grass toward the rickety Bobotov Kuk sign and you’ll quickly spot the red and white circle way markers. These spray-painted signs will become very familiar on this hike (and any others you do in Montenegro), and they’re clear, frequent, and well-spaced on this hike: you should keep an eye out for them if you’re ever unsure.
Once you’re on this path, the rest of this first section is quite obvious to follow though, and no proper navigation is required.
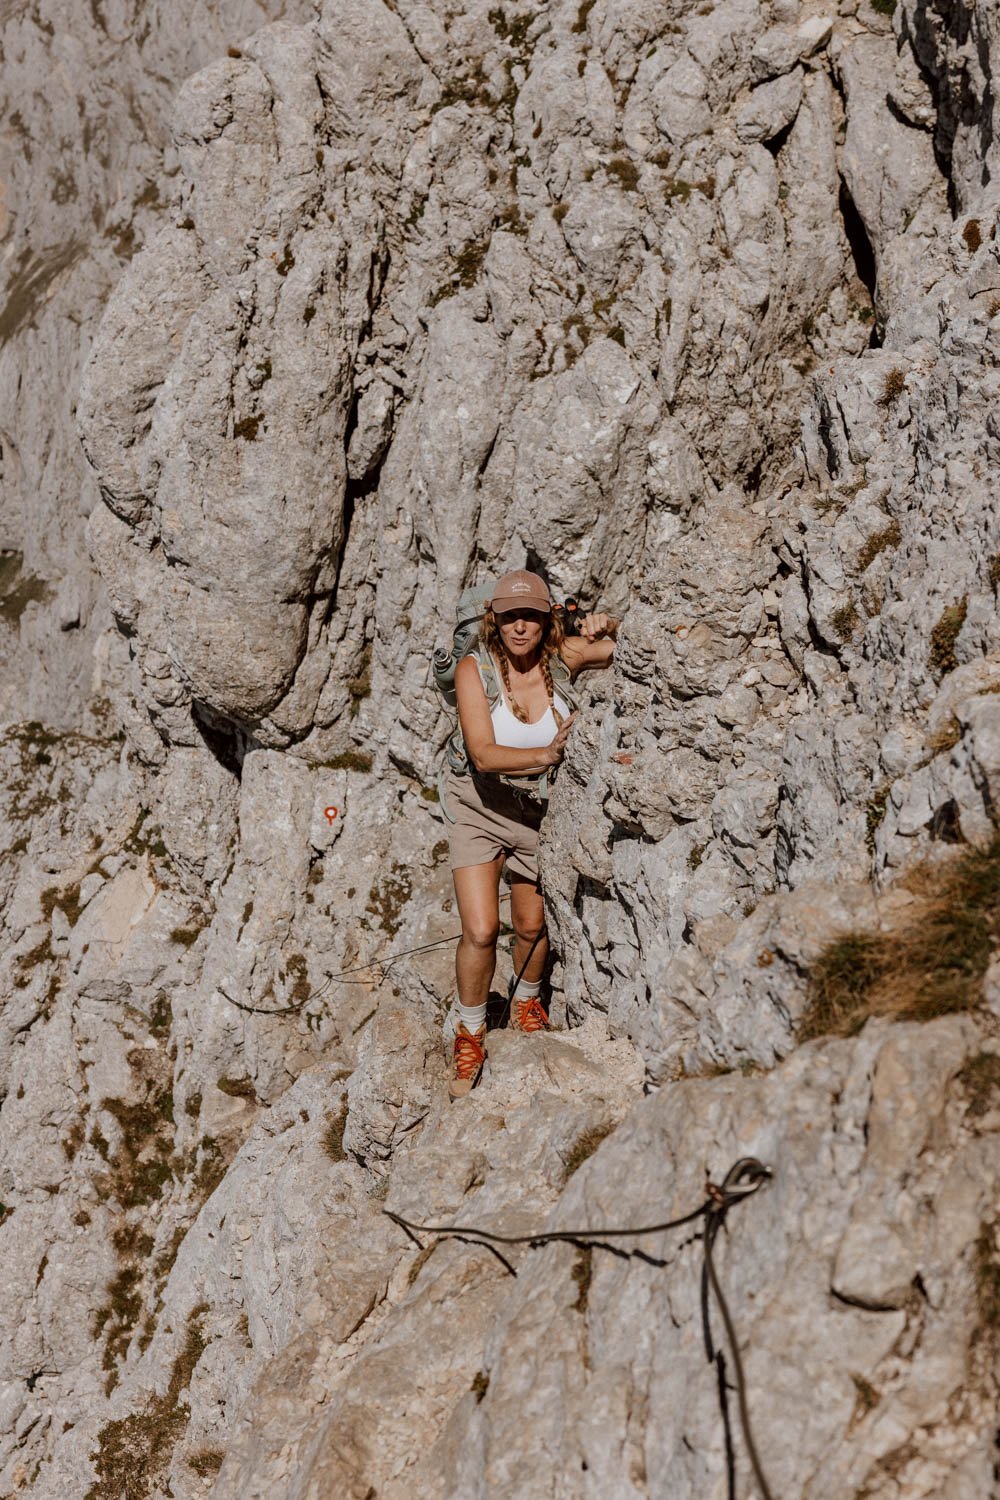
You’ll quickly merge onto a narrow trail taking you along the rock face, where there’s a rope cable for support and a little bit of a scramble required on the upper area. Most won’t find any issues here but, for those who are less fit or experienced, this short section is going to be a good indicator of how you’re going to deal with the more daunting parts of the trail later on. If it’s very difficult or vertigo-inducing, it may mean the summit ascent is going to be beyond your comfort zone.
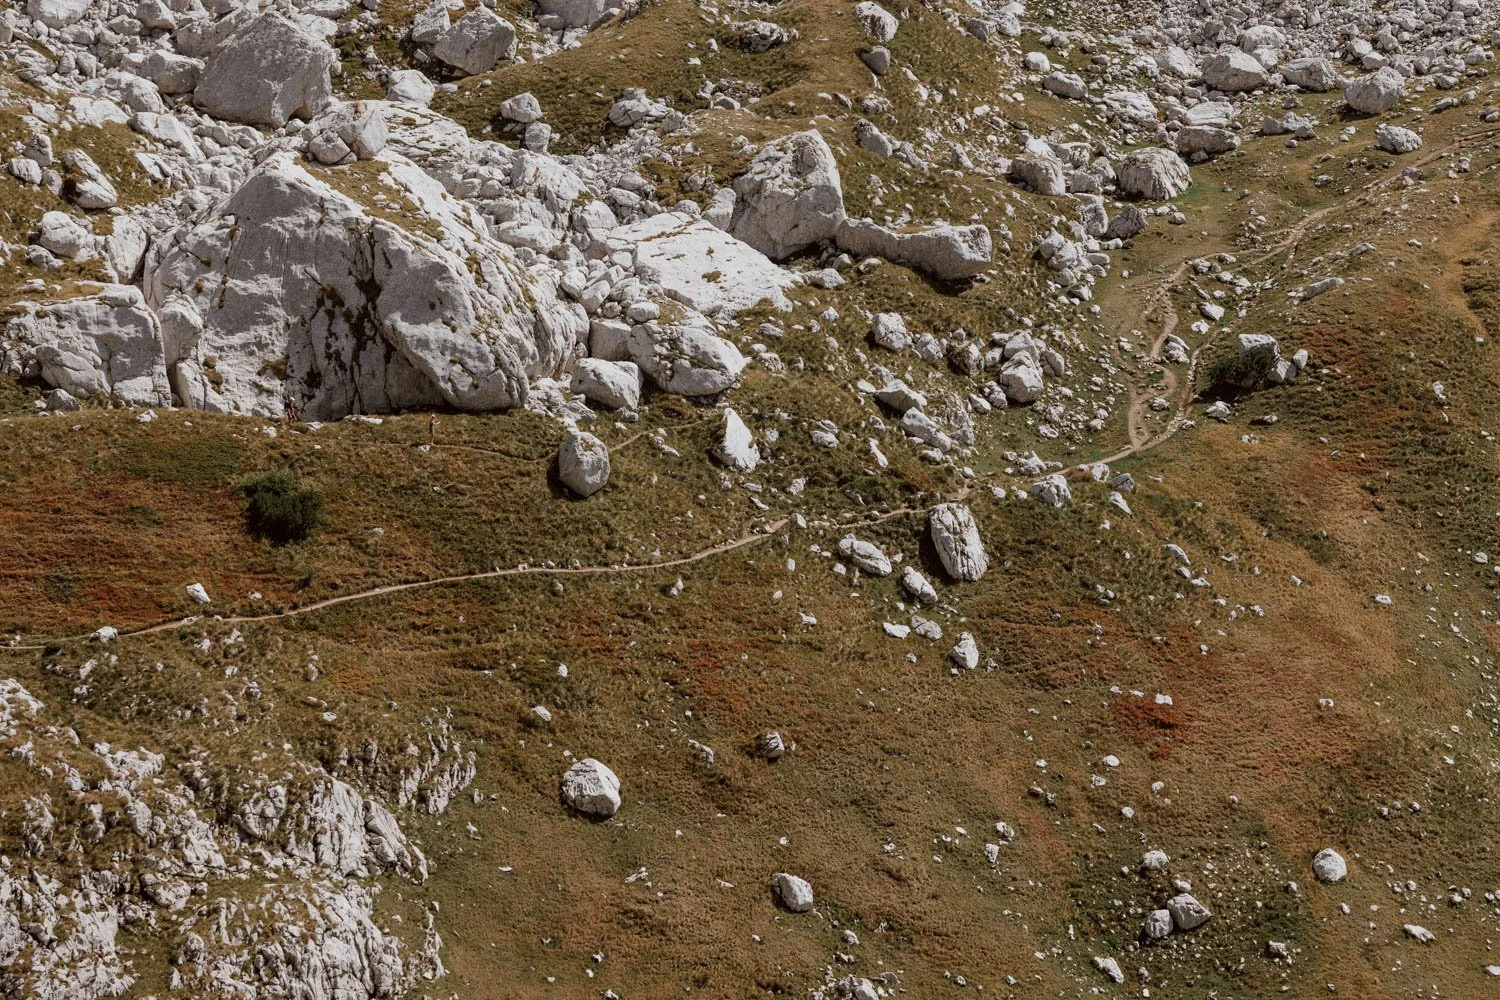
Once you’ve successfully navigated those cables, you’ll join a narrow, easy-going dirt trail that’s been cut into the grass and enter a beautiful, flat(ish) plateau with rocks like dinosaur vertebrae scattered around. The scenery evokes a little of the Scottish Highlands until, about 45 minutes in, the jagged blue-grey peaks appear and transport one straight to the Dolomites of Italy.

This is a gorgeous, straightforward section to walk through with only gentle ups and downs and, sincerely, we wouldn’t rush it just for the sake of making up time.
You’ll then go down into a dip, traverse another flat section, and then hit the first rocky ascent in a while. It’s a short one though, and you’ll finish on a natural point to enjoy your breakfast or take your first breather. Conveniently, this spot came in at exactly 3km from the start point. Whilst there, cast your eyes toward the intimidating half-crown of peaks in the distance and focus on the highest one, which looks almost impossible to reach.
That bad boy is Bobotov Kuk, and your final destination.


From the natural break spot, it’s a steepish descent into the valley floor along a narrow path weaving between rocks.
The terrain becomes more rocky all around and there’s a bit of clambering involved, so you need to be a little more sure of your footing and keep an eye out for the red and white dots to be certain you're keeping on the right path.
It’s then a gentle, flatter section via a mostly dried-up lake, passing several spray-painted boulders until you reach a clear end-point before the next section begins.
By the way, keep an eye out for the super cool layers on a mountain you can see on the latter half of this section - we’ve never seen anything like it and would love a geological explanation if any of you have one!
Know // When you begin the descent into the valley floor, don’t worry if you lose sight of hikers that were ahead of you. They’ll disappear due to the nature of the next section’s topography and route profile, so just follow the dots and you’ll be fine.
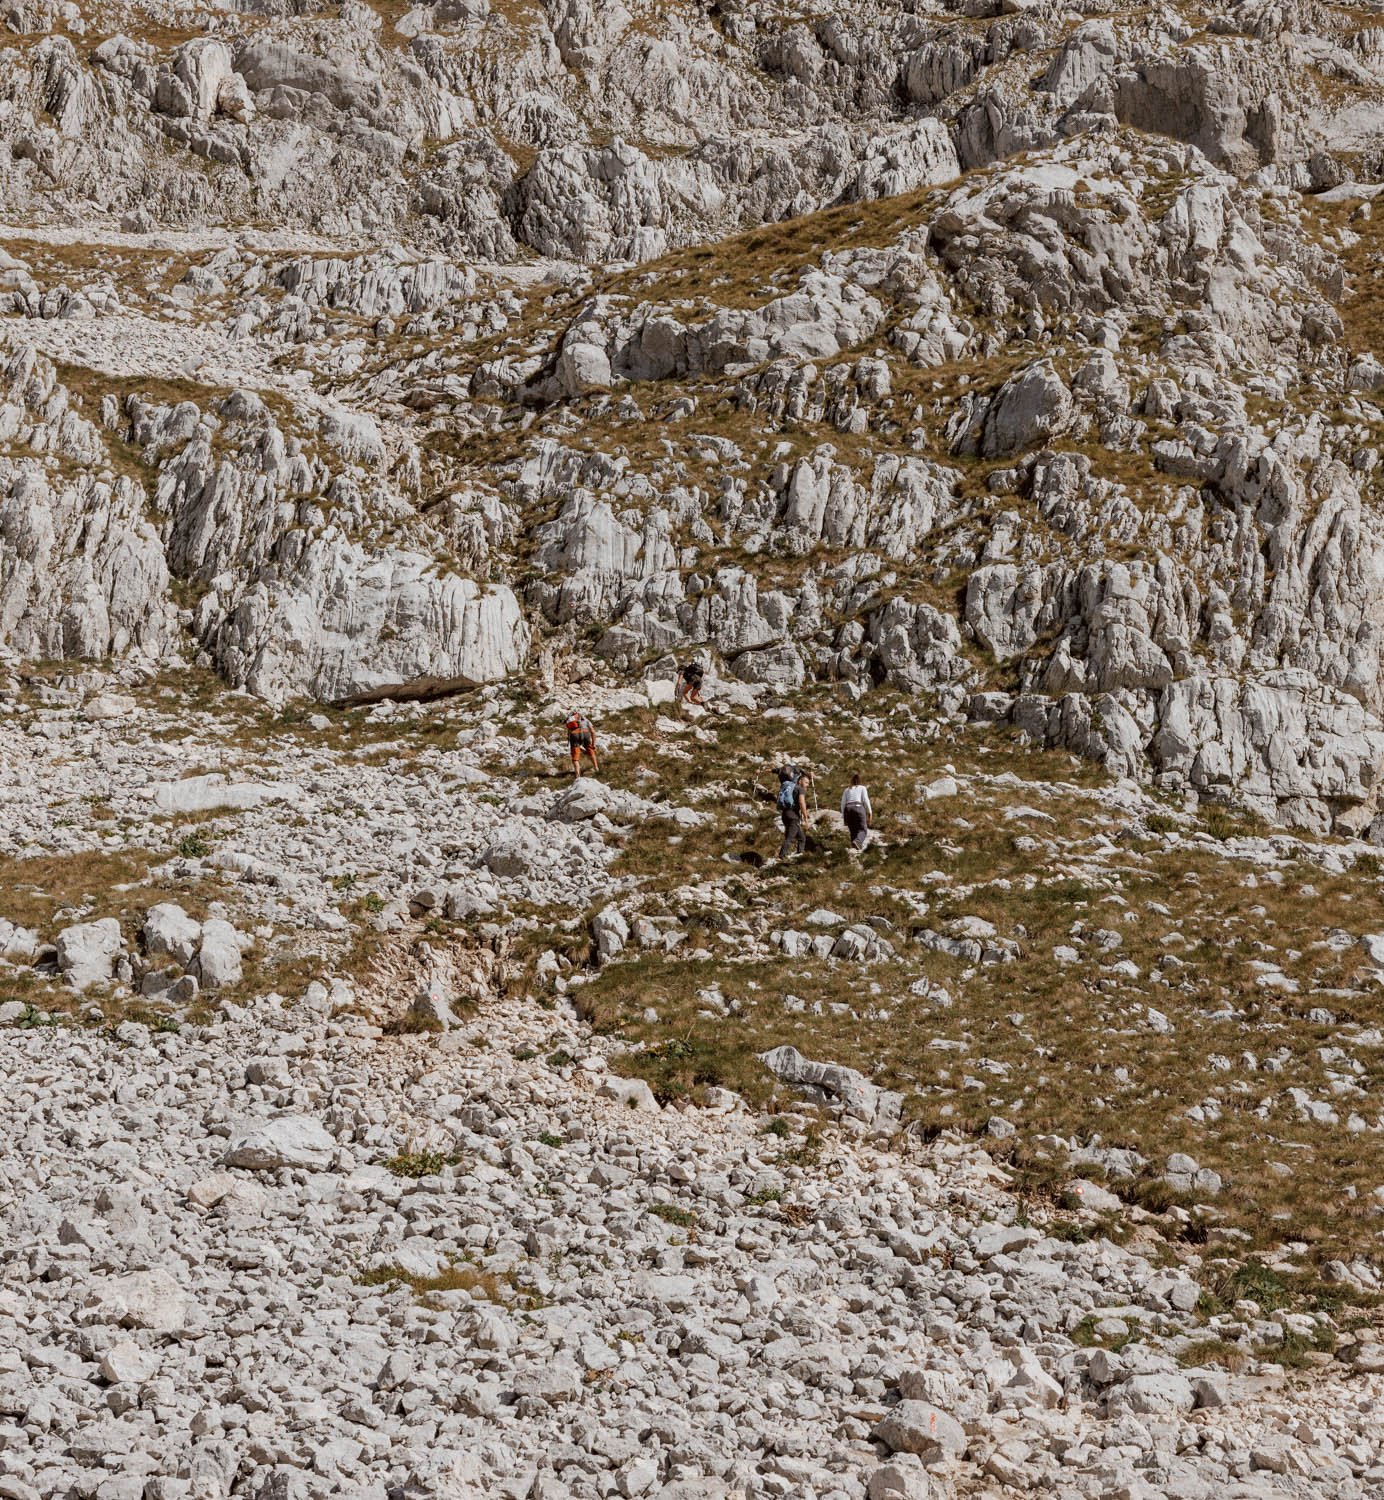
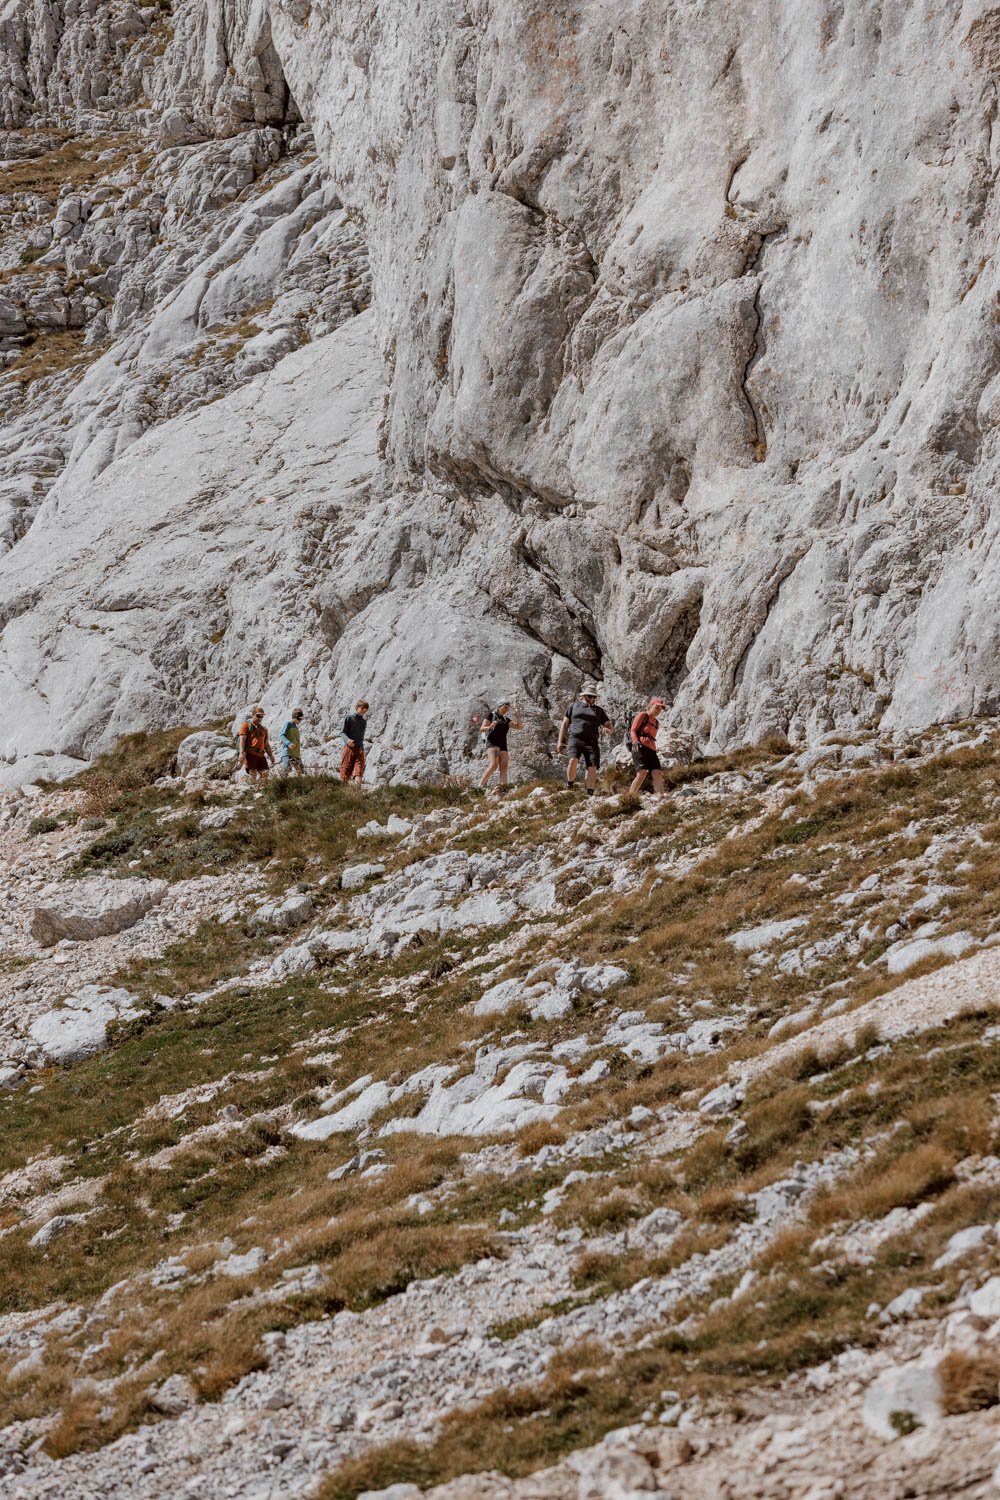
2/ The Ascent to the Ridge | 1 - 1.5 hours | Moderate to Challenging
The shift from previous section to this one is clear.
Dirt and meadow give way to scree and silver rock, whilst the gradient cranks up immediately. Underfoot, it’s a mix of loose shifting stones, unstable rocks, and slippy stones. The trail markings remain numerous and well-spaced out, but it’s easy to stray away from them if you’re not paying attention or just blindly following the person ahead of you. Not a major issue, but it can mean going over looser, less compacted terrain which can make it more it more tiring.
Having said that, due to the type of terrain, steep gradient, and differing paces, bottlenecks are common on this section, and there are clear moments when diverging for a few minutes onto a secondary path to the next switchback may be quicker and / or easier than going the ‘official’ way.


Due to these logjams and the stop-start pace as people need a breather, it’s important be considerate of those in front who are slower than you, whilst those moving more slowly should definitely stop to let people pass if there’s a long line forming behind.
A key feature for this section, not too long after it begins, is the narrow crevice climb. There’s are cables for assistance, though it’s possible to do it unaided. This wasn't challenging at all for us on the way up, but was trickier to navigate on the down with tired limbs and unclear foot holds. Be mindful of the loose rocks and pebbles, which make it potentially dangerous for the person directly below you - we suggest patience and waiting for the hiker ahead of you to clear the crevice before starting your ascent.
And remember: if you go up, you’ll have to come down it later!
As before, if this climb feels too physically challenging, the final ascent to the summit Bobotov Kuk will likely be too much.

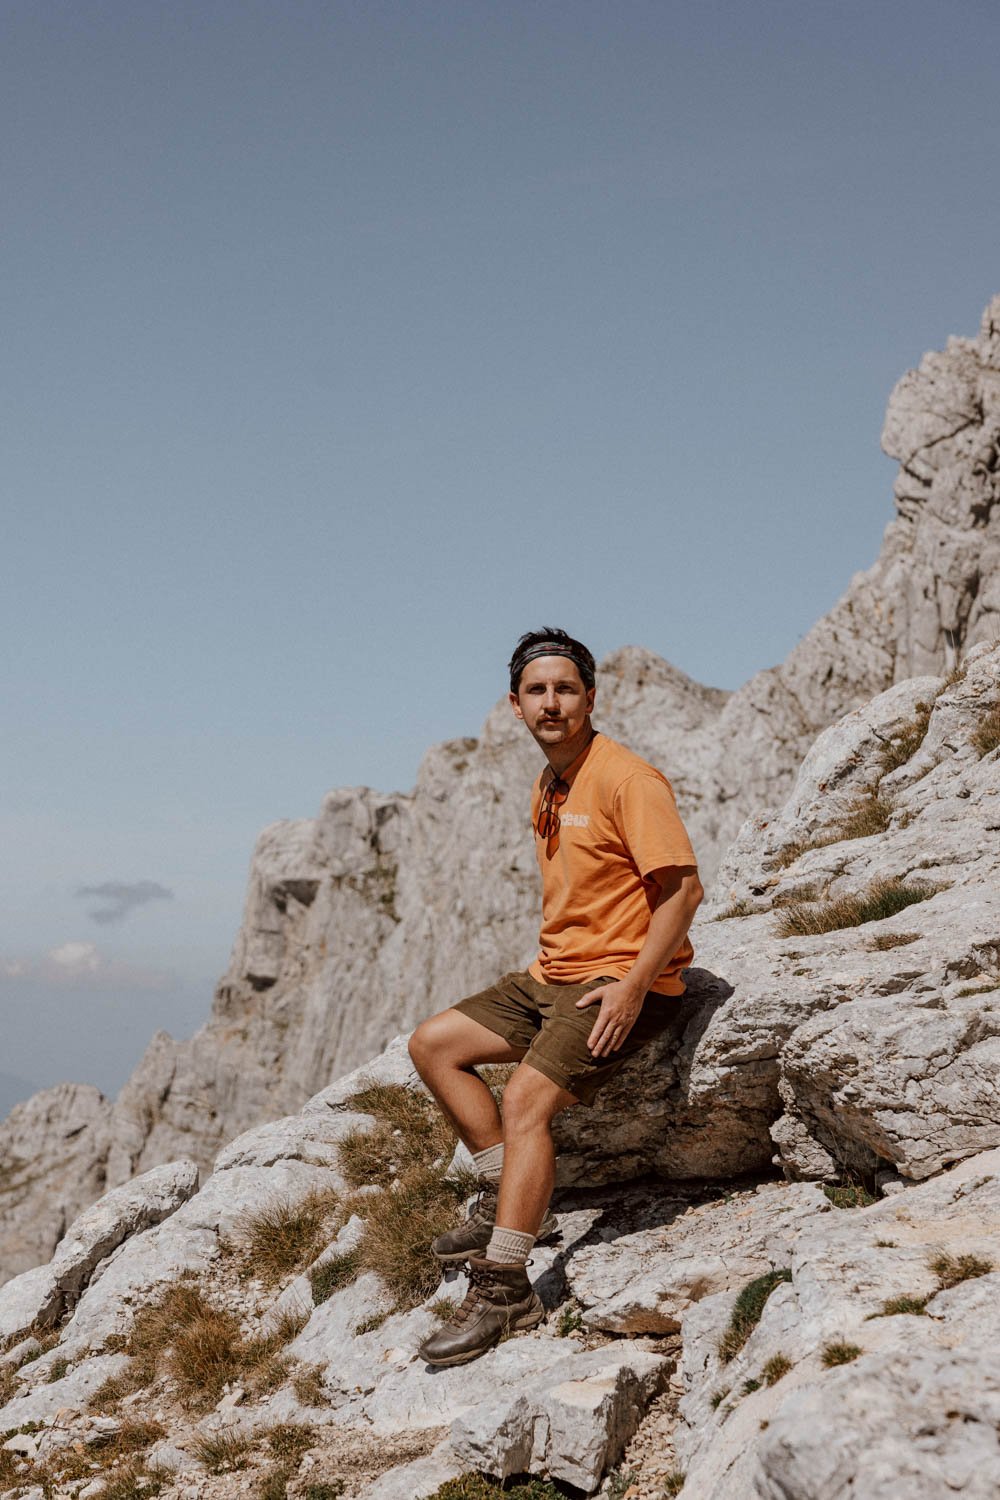
The first stage of this section 'ends' at a flat ridge with views over the peaks and down into the valley - when you see a bent pole sticking out of the ground, you’ll know you’ve made it there. This is another natural rest point (for hikers and dogs!) and also where that trail from Žabljak joins up.
From here, keep left and it’s another steady incline, again with very loose rocks and stones throughout. There are a few areas where you’ll need to clamber. As before, the markings are very well spaced out and clear, but you have to pay attention at times to know which is the easier direction to follow.
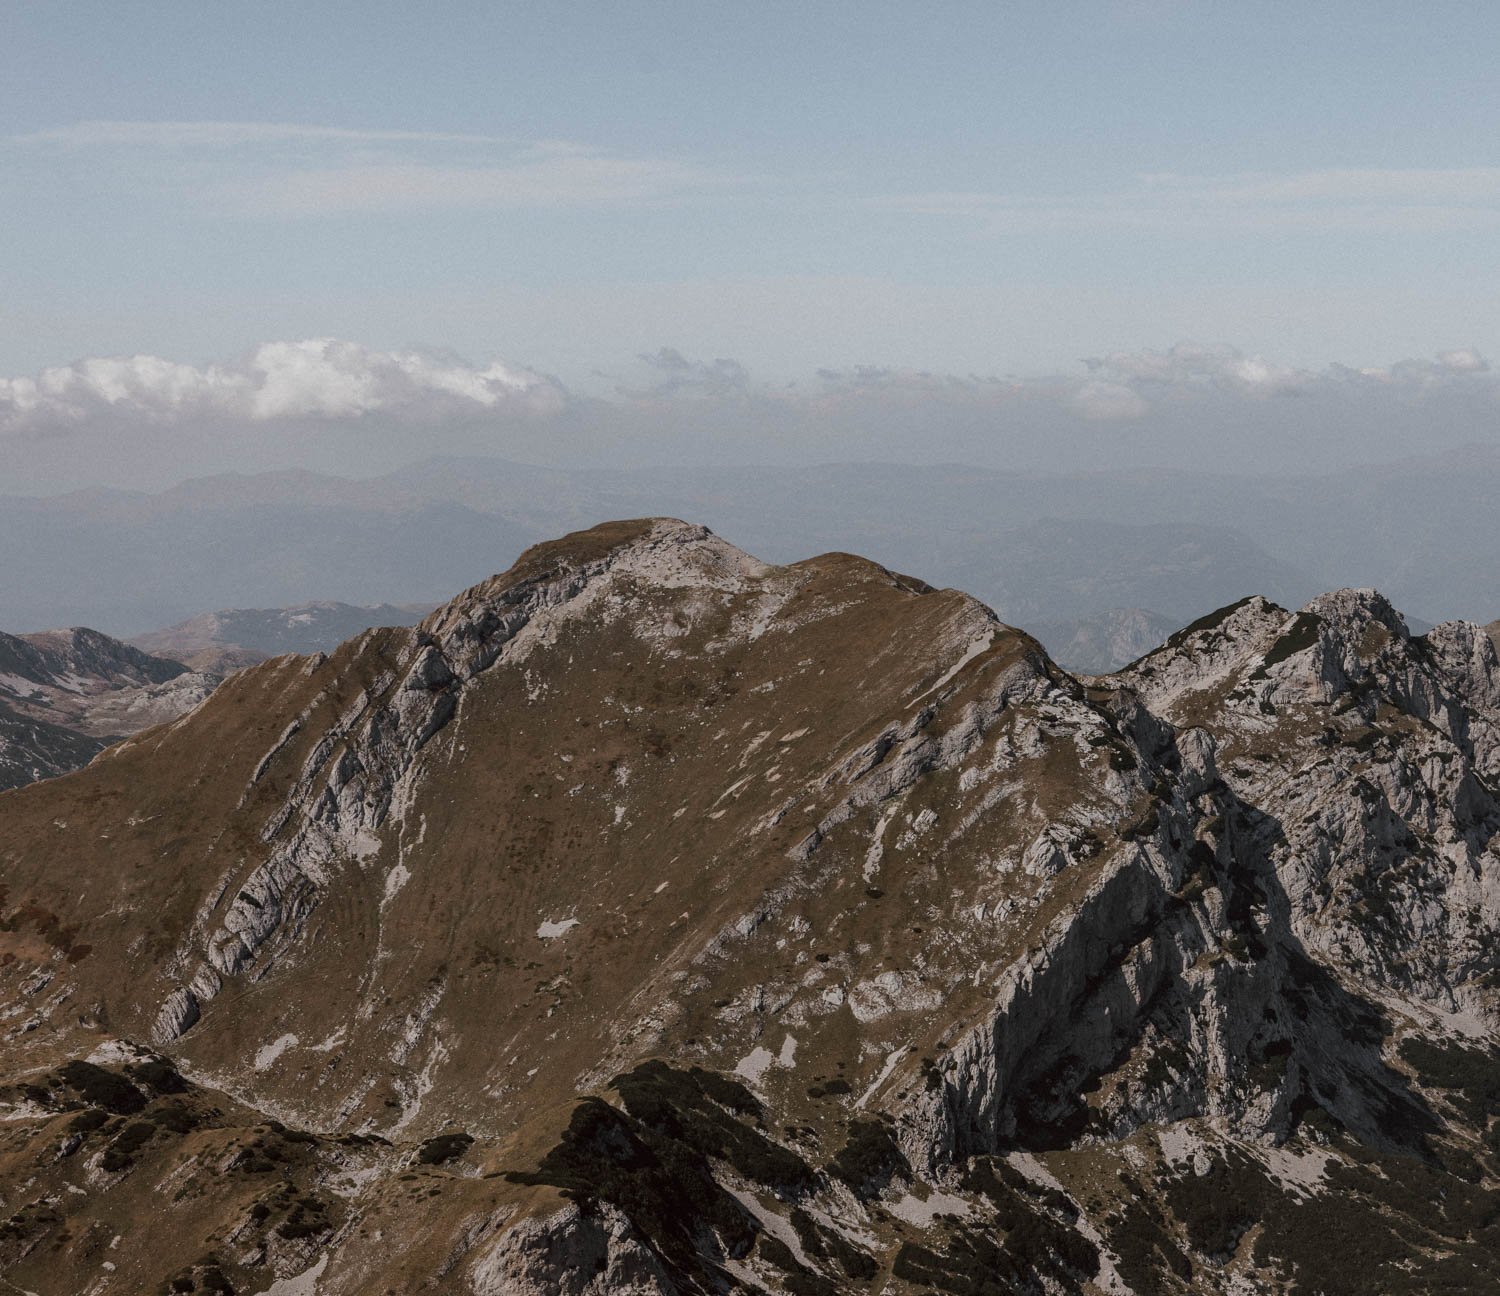
Soon, you’ll reach a natural lookout with panoramic views over the route you’ve just conquered. If you haven’t already taken a moment for snacks and a proper breather, this is as good a spot as any.
Return // This steep section from the ridge back down was the worst part of the hike for us. It dragged on and on, and you’ll have to try hard to not slip, fall on your arse, or turn your ankle. This type of uneven, rocky terrain is Emily’s most detested, and it’s very easy to loose your footing as it’s uncomfortable and unreliable underfoot. Hiking boots will make this much easier, as will poles if you have them; there are parts where you’ll be more stable and comfortable lowering your centre of gravity and using your hands to steady yourself on the rock.
For those who began early, or those starting later, know that you'll have a lot of traffic coming from either direction on this part as well...which can be frustrating at times…but a nod and a smile is always the way to go!


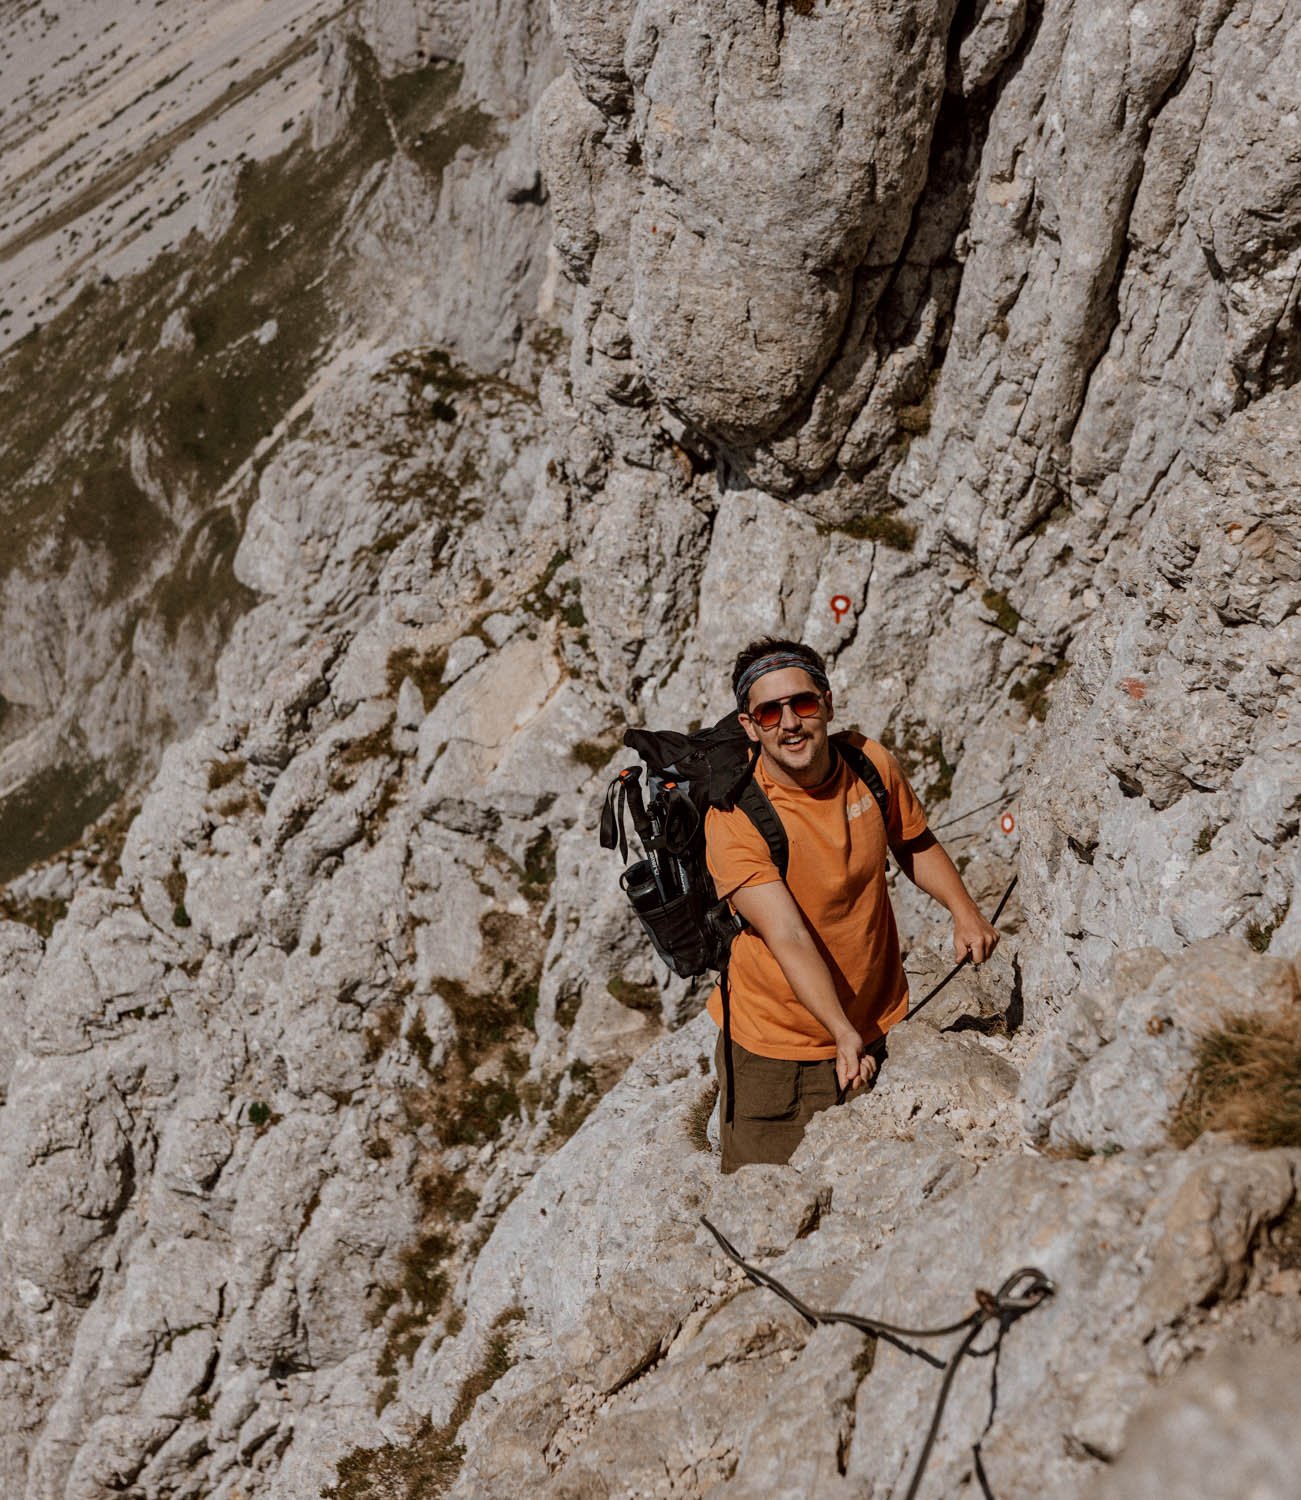
3/ The Cables & The Summit |30 - 45 minutes | Difficult
Now the fun really begins.
The path to the summit will be the deal-breaker for some, but for others it's going be the most memorable part of the whole Bobotov Kuk hike.
From the aforementioned lookout point, follow the markers up and to the right: you’ll emerge out on flat, skinny stone and dirt path hugging the craggy cliffside and a phenomenal viewpoint of a lake and unfathomable number of peaks around and beyond.
It’s from this point on that those with a fear of heights or vertigo may struggle, as there’s the constant companion of the drop on the left hand side (but we recommend that everyone at least heads up to this viewpoint).
You keep going along this path for about ten minutes, with a little bit of scrambling required to lift yourself up and over rocks, until a clear moment where the path transforms into the proper, challenging technical combination of steep climbing, scrambling, and cables bolted into the rockface.
If you don’t have foldable hiking poles like us, it’s a good idea to leave yours behind at this point as they’ll become more of a hindrance than a help.
For those who do have serious concerns about vertigo, this is the point where you’ll definitely want to turn back (we spoke to four hikers who did due to fear).

About halfway up this section you'll come to the cables attached to the mountain side, and you will need these to safely navigate the route right along the rock face with a very narrow ledge.
At points, it’s barely a boot’s width wide.
Whilst the cable section is quite short, it isn’t without risk, and you really do have to pay attention at all times and proceed with care.
If you fall, you're fucked.
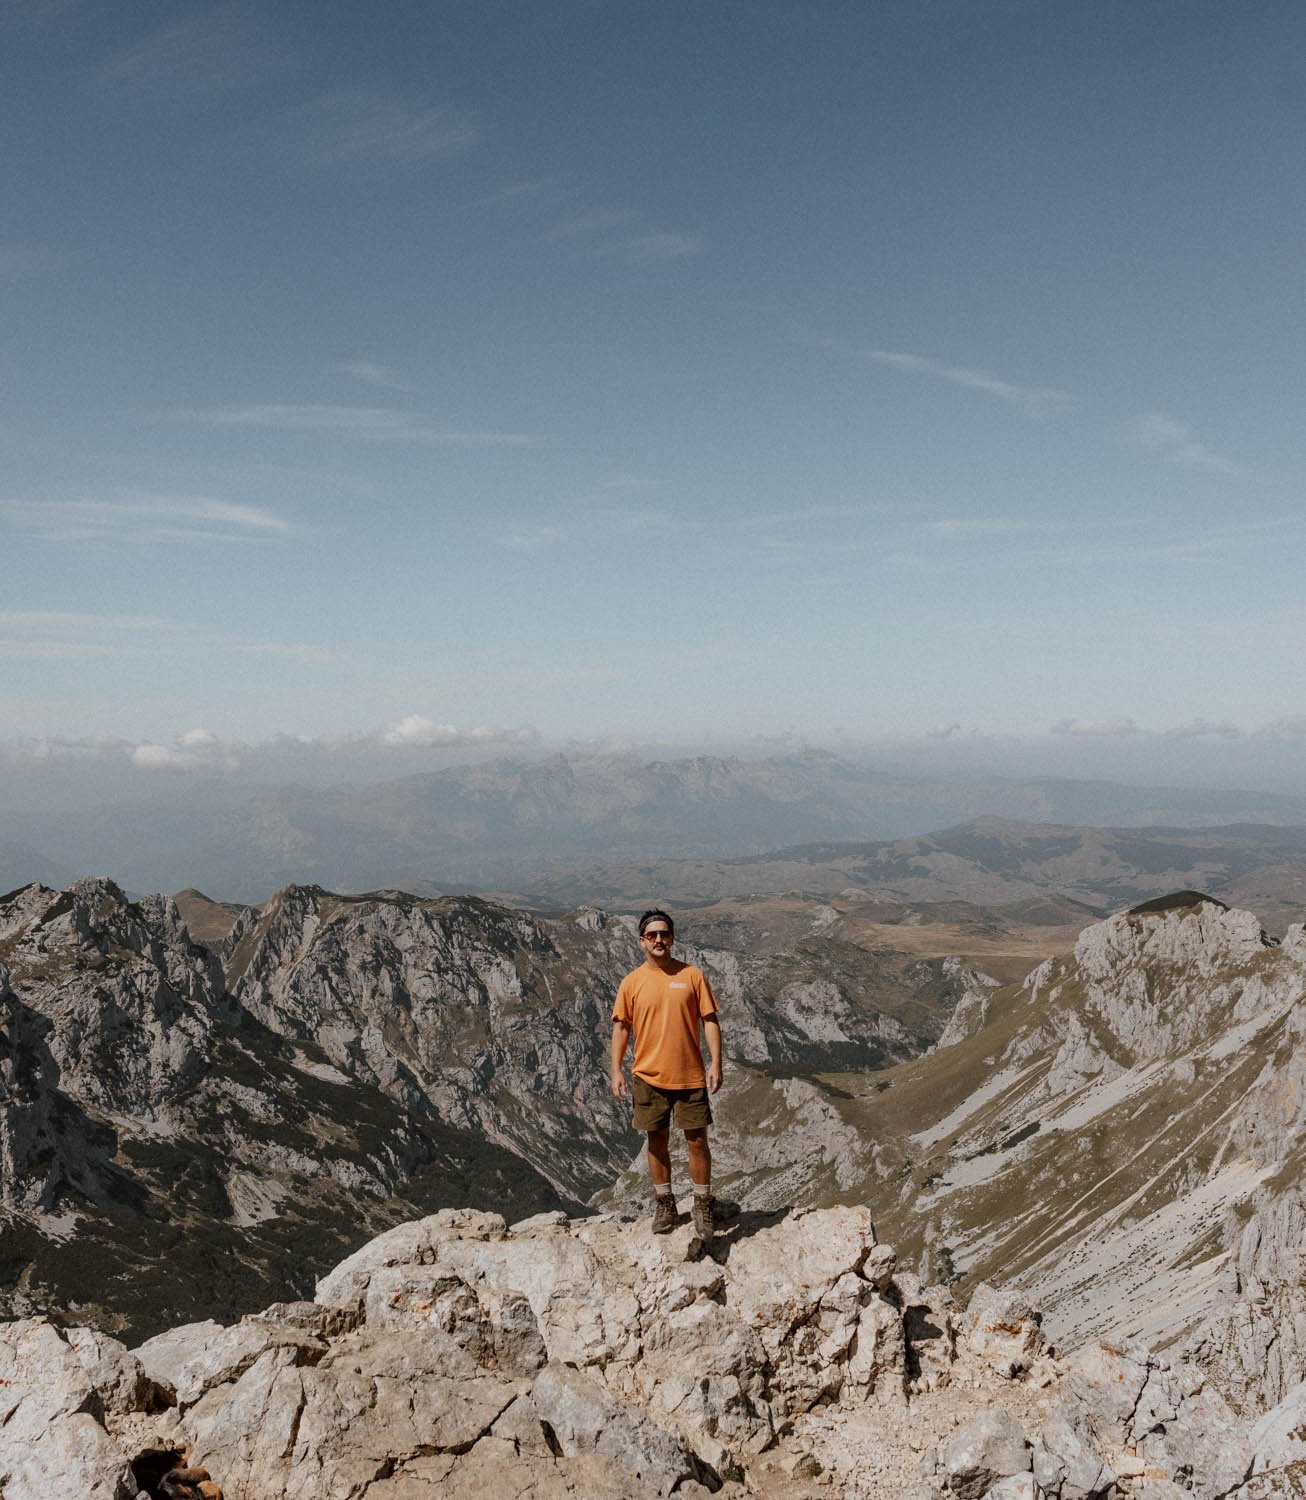
When the cables run out, heave yourself up on to the rocks and you'll see the summit just ahead, offering up stunning 360-degree views and a real sense of achievement. Whilst it can get a little crowded, there’s plenty space to take hang out and take photos.
Surprisingly, there were also about six dogs mooching around up there, which brought back memories of various hikes in Latin America. All were friendly, and happy to accept fuss, food, and water. There’s also a metal box with notebooks if you want to write something.
Once you’re done, you’re going to follow the exact same way back down to the car park.
Return // It's not too difficult going up as long as you're paying attention, but much trickier coming down on the cable section, especially if you have to pass people coming the other way. Emily had to work her way around another couple waiting to go up, which required her to let go of the cable - she tipped forward at one point and almost lost her footing (quite a heart in mouth moment and a reminder of how dangerous this hike could be if you're going too fast, messing about or not paying attention.
Consideration, care, and patience are essential. Never ever rush someone or be a dick here.


The Difficulty Bit & The Golden Rule
How tough is the Bobotov Kuk hike? Without the cables to the summit, we’d rate it as ‘moderate to challenging’ but possible for any one in decent physical condition. It’s steep and tiring in parts, but nothing that experienced hikers or those who have prepared would find too much.
Apart from general fatigue on the way down and longer-than-expected walk back to the car park, we had expected to be more exhausted.
However, that cable section increases it to an overall ‘difficult’ rating. If you are really uncertain about your ability to safely complete it, then don’t feel any shame about turning around - but if you go up to the summit, there’s no alternative way down.
The good news for anyone who isn’t an experienced hike or those who suffer with vertigo? As it's an out-and-back, there are key points where you can decide not to continue if you’re struggling. Even if you just hiked to the lake viewpoint and turned back then, this would still rank as an incredible, scenic, and must-do hike.
Even hiking just that first section in-and-out is worth it for the views and landscapes.

What You Need & The Hike Better Tips
· This hike can done independently without a guide. However, inexperienced hikers or those concern about fitness may prefer to head up with a guide or group.
· There aren’t many options available online, but this private Bobotov Kuk day-trip hike includes a guide and transport from various destinations in Montenegro.
· We sincerely recommend making a day of it and not rushing the Bobotov Hike. This is the jewel of Durmitor, and you won’t see or enjoy better scenery on the same day whilst there’s not much in Žabljak to rush back for. Given the choice, we’d much rather spend an extra couple of hours up the mountain than back in town.
· As mentioned, starting before 9am is going to give you the best conditions and fewer bottlenecks, but it’s not a deal-breaker.
· A pair of broken-in hiking boots are absolutely the best choice. If you’ve not brought any, then the next best option are a sturdy pair of sports trainers - don’t even think about doing this sandals or flip-flops. If in doubt, Hostel Hikers Den has a lot of boots that guests can borrow.
· If you’ve got hiking poles, take them for this hike. We brought our collapsible poles for our Montenegro hikes, and they were ideal.
· You really need to watch your footing on the way down, and a slip, stumble or potential arsefall is almost guaranteed.
· There is very little shade or cover available on the hike, so bring a hat and suncream.
· This hike should only be attempted by most from around May to the end October, and you should always check weather conditions the day before you hike and on the morning of.
· It’s best to prepare for changeable weather and contrasting conditions: everyone should have at least one additional layer, and note that it can sometimes become very windy at the summit.
· There are no facilities or shops on or around the trail, so you need to bring all water and supplies.
· Two litres of water per person is a minimum, and we saw no springs or taps to fill up on the route.
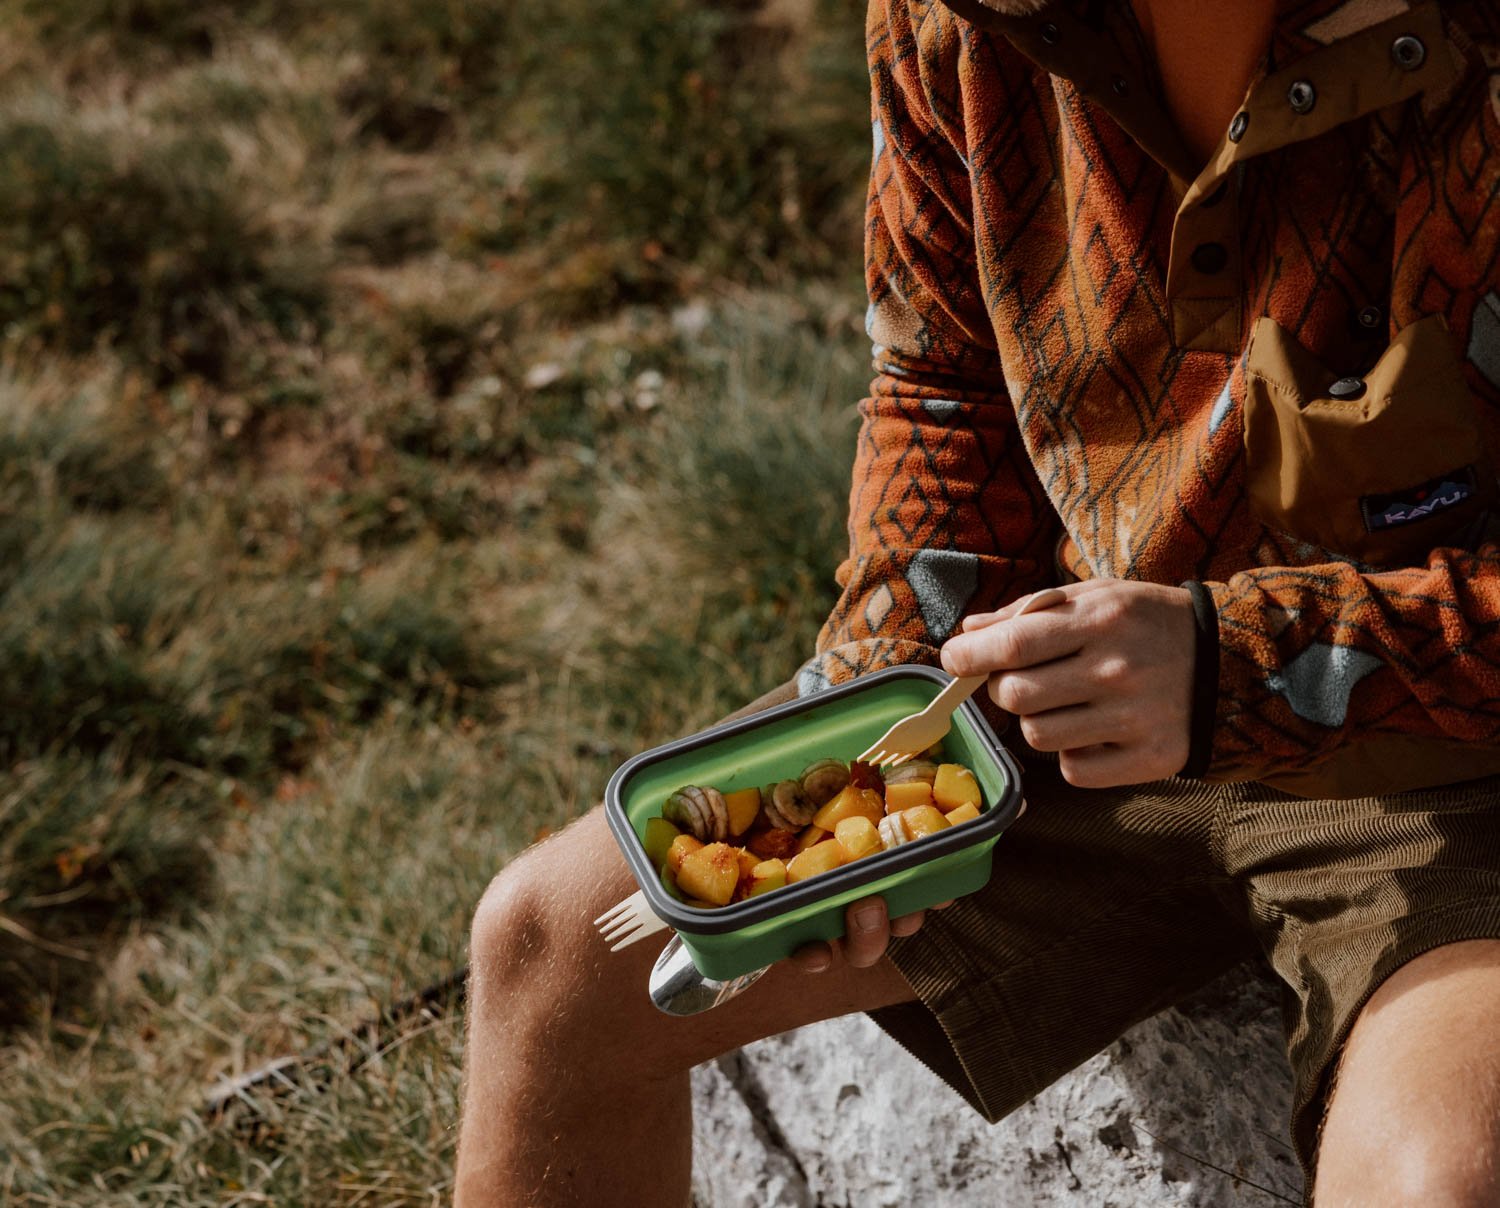
· Whether starting early or not, we recommend packing a breakfast or lunch - there are fewer more beautiful places in Montenegro to sit and enjoy it.
· A hike is only as good as the snacks you take, and sweets are a good back-up to have if your energy is running low on the way down.
· Orange peel and banana skin take ages to decompose and are litter - don’t leave them on the trail.
· We alway recommend bringing an offline map of a hiking route (we use AllTrails), but as Bobotov Kuk is a very clearly marked out-and-back, it’s not as vital.
· Note that some of the red and white markings have an 'arm' or 'pointer' on the circle to indicate which direction you should aim for.
· If you haven't got many days in Durmitor National Park, remember that the Sedlo Pass and the surrounds at the start / end point is one of the most scenic areas in Durmitor, so you may wish to drive / walk down the road at the end of the hike.


